

Red Aster Granny Square Scarf Pattern
At the beginning of the year, I released the Aster scarf collection: cute little crochet scarves using simple granny squares. I also put together a blog post showing how to make the small Aster scarf.
As I crocheted the colourful stash-busting scarves, I was already wondering what an Aster scarf might look like if it were super-sized.


What’s New For Red Aster?!
Red Aster is obviously much longer than the original Aster scarf; it’s wider too. I’ve added an additional row of granny squares to make it two rows rather than a single stripe of squares on the diagonal. They are still encased in granny triangles, which straighten the scarf edges.
Crochet is such a versatile craft that it’s always easy to make tweaks and adjustments. It’s great to see what new ideas come from making little changes.
As Red Aster is a larger crochet scarf, it goes without saying that you will need more yarn. And probably more patience. I found it to be a real labour of love to sew in the squillion ends of all the granny squares and triangles. It fills me with temporary despair but long-term joy.

Continuous Join As You Go Granny Square Scarf
The other new thing for the Red Aster Granny Square scarf pattern is the introduction of a different joining technique: The Continuous Join As You Go method. Not gonna lie, I changed it because, fundamentally, I’m lazy. I did not relish the thought of sewing nearly one hundred squares and triangles together! I am normally capable of squashing down the trauma of crocheting in extra ends, but eh, not this time.
A standard JAYG would mean cutting yarn after each square, and although this is the technique for the original Aster (I needed the scarf edges to be stitchless for the look I was after), I was willing to change the edging to save time and energy. The Continuous Join As You Go method is much quicker as well, so obviously, it’s an excellent choice!
A bonus Red Aster pattern has been added to the original collection that now includes a “map” of the scarf CJAYG layout. I dutifully followed it when I was crocheting Red Aster, and it was invaluable.
Check out the video tutorial for the Continuous Join As You Go method from when I made a baby blanket a few months ago. The shaping of a square blanket is different from Red Aster’s long trapezoid, but the joining principle is the same.
Granny Square Scarf Fun Facts To Make Your Own
Before you read on, I don’t want to assume you know everything about making granny squares and triangles. But I also don’t have room to share it all in this post. So, with that in mind, let’s do a roundup of useful crochet info you might need to make the Red Aster Granny Square Scarf,
- Little Aster has a video tutorial for how to crochet Granny Squares and Granny Triangles. Go HERE for the Little Aster scarf.
- The Red Aster scarf measures: Width: 17 cm / 6.75 inches. Length: 269 cm / 106 inches.
- I used 350 grams of DK yarn in total. Although the data is provided in the pattern, it’s not something I worry much about in stash-busting patterns. An unplanned higglepdiggledy approach is often better.
- A 4mm hook is a good hook size for DK yarn.
- If you don’t have the confidence to haphazardly bung together random colours for granny squares, check out my video for how to arrange colours for granny squares.
- For the main colour, I used 4x 50 g balls of merino DK (more deets below).
- You need to crochet 49 granny squares and 49 granny triangles. For this project, they are two-round grannies. The third round is added with the CJAYG.
- The CJAYG tutorial is just above; click there to learn how to crochet the Continuous Join As You Go.
- At the end, when you’re finished, are you really truly finished?! Blocking your granny Scarf is a good idea. Learn about blocking crochet HERE.
- Buy the Aster collection on Ravelry
- Buy the Aster collection on Etsy

Yarn For Red Aster Granny Square Scarf
To crochet your own Red Aster Granny Square scarf, you will need lots of lovely DK yarn. This is a super stash-buster crochet pattern, so dig out all of your colourful yarn scraps.
The red edging is Drops Daisy in Red (20); I made sure to have 4 x 50 gram balls and had a little bit left over. It wasn’t enough to add a decorative border, but I don’t actually think I would have added one anyway. I quite like it as it is.
I am usually happy to mix different yarn brands, sometimes different fibres, too. It’s fun to have a happy scrappy crochet project sometimes. However, I have two current favourites when it comes to DK yarn, and they both feature heavily in the scarf: Yarnsmiths Merino and Drops Daisy, which is also a merino yarn. They are both delightfully soft and squishy. And I like the colour palettes in both ranges.
How Much Yarn Do You Need For The Red Aster Granny Square Scarf?
My granny scarf weighs about 350 grams in total. Just under 200 grams (440m) of that is the red edging, so I calculate that you need approx. 150 grams (330 metres) of contrast colours. You probably need a bit more, though, because let’s also account for the ends I chopped off. And, if you think about it, you need enough for complete rounds in many colours. There’s always some finagling with yarn amounts for granny squares, so make allowances for that.
More details are in the downloadable Aster pattern, which is available on Ravelry, and you can buy a copy in my Etsy store. The pattern has the whole collection of scarf designs.

How Many Granny Squares And Triangles?
I briefly mentioned the number of squares you need above, in the Fun Facts section. Just in case you didn’t spot it, I’ll tell you here as well.
You will need to crochet 49 granny squares and 49 granny triangles to make the Red Aster scarf. Each granny square is only two rounds. The third round is incorporated when joining with the red round.
I made a few squares/triangles per night over a series of weeks during spring. I attempted to sew some ends in as I went because I knew I’d not forgive past me if I didn’t at least try. Normally, I leave them all until the end of a project, as, ugh, ends. But, you know, it’s just easier to do it little and often, right?!
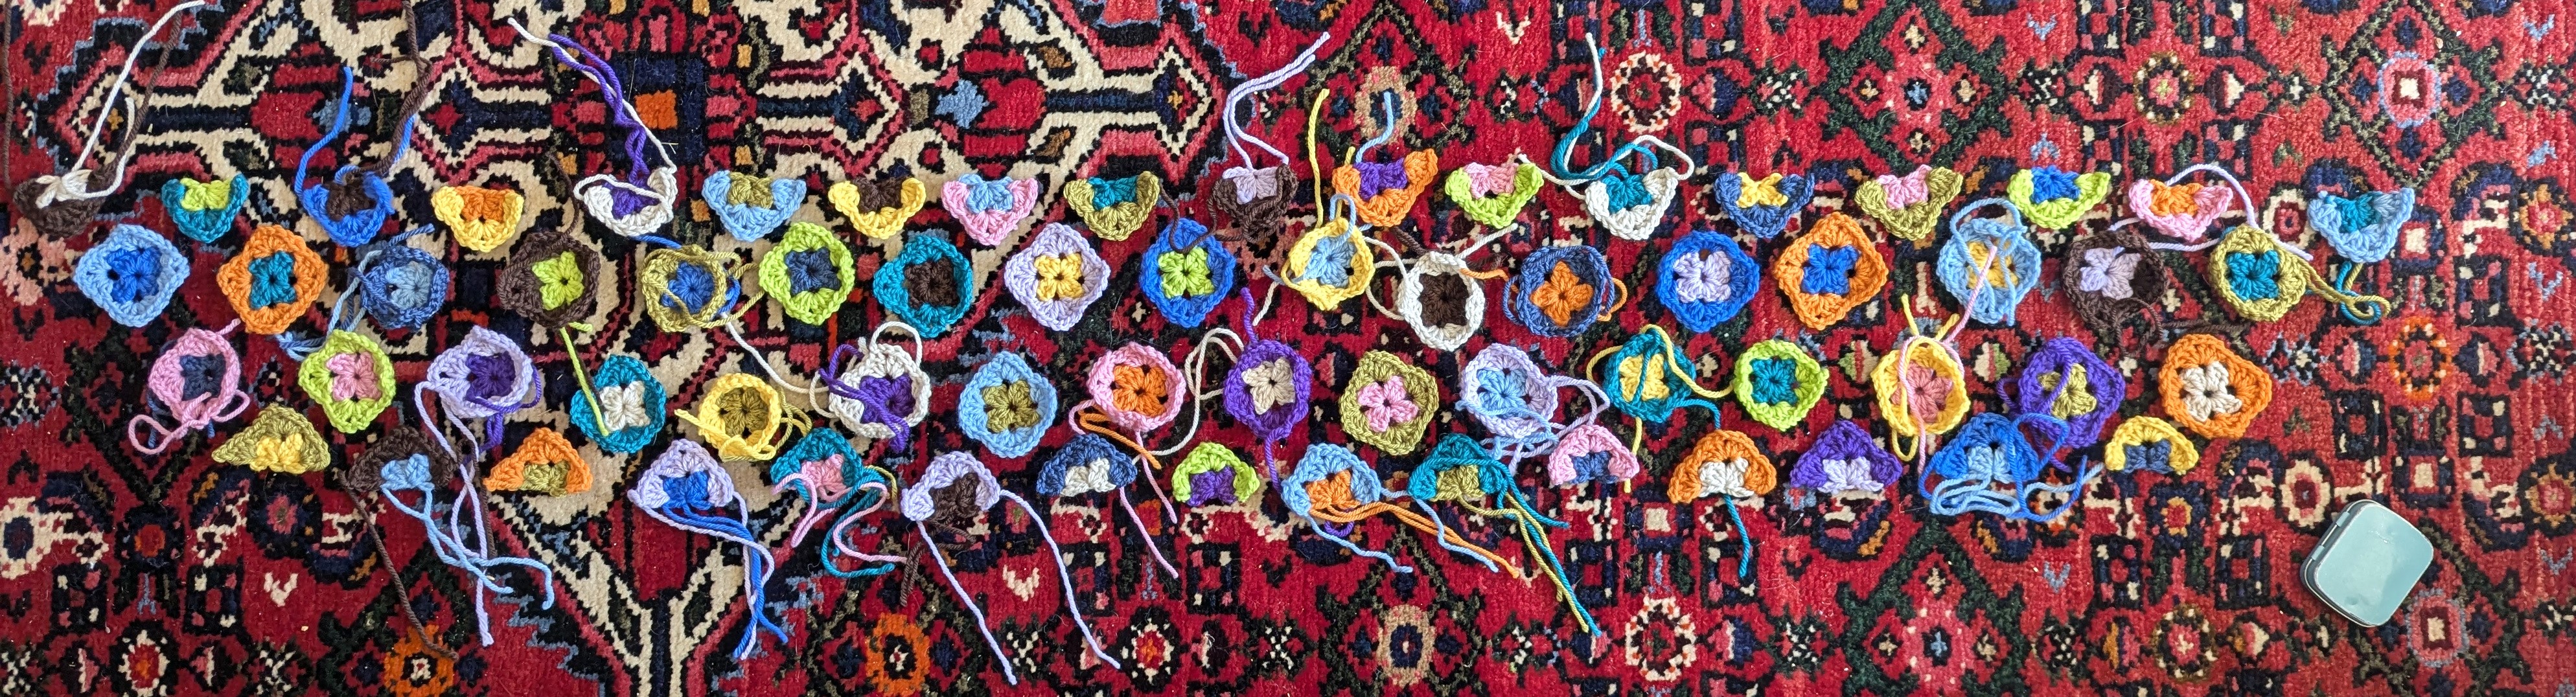
Pictured below is my square layout. Ignore the fact that there are fewer squares than the final product. I got this far and knew it was too short, so I made more motifs until I was satisfied with the length. Don’t look at the ends.
Note that there isn’t any red in the first two rounds of these squares. That’s deliberate.
Make Your Red Aster Granny Scarf
With everything in mind, here is a step-by-step, nutshell order for how to crochet your Red Aster granny square scarf.
- Gather your DK yarn stash and a 4mm hook (or hook size of your choice).
- Crochet 49 two-round granny squares and 49 triangles.
- Sew in ends.
- Arrange them in a random order (as above).
- Use CJAYG to crochet the granny squares and triangles together.
- For best results, block.
Have Fun With Granny Squares
Hurray, your granny square scarf is complete! Hopefully, you should have a good idea of how to make your own Red Aster Granny Square scarf! But don’t forget that you can download the Aster collection, which has more detail, clear written instructions, and maps/charts to help guide you through making the patterns.
However, don’t forget that you can have lots of fun with granny squares (and triangles) by just playing around and seeing what you like. You don’t have to stick to these ideas, as though they’re immovable. Try different yarns, try different-sized squares, different fibres. Crochet is brilliant for trying new ideas. If they don’t work, it isn’t the end of the world, but if the ideas do work, then it’s magic!
If you enjoyed this crochet recipe, check out my other free crochet patterns right here on the blog. Cheers. x


