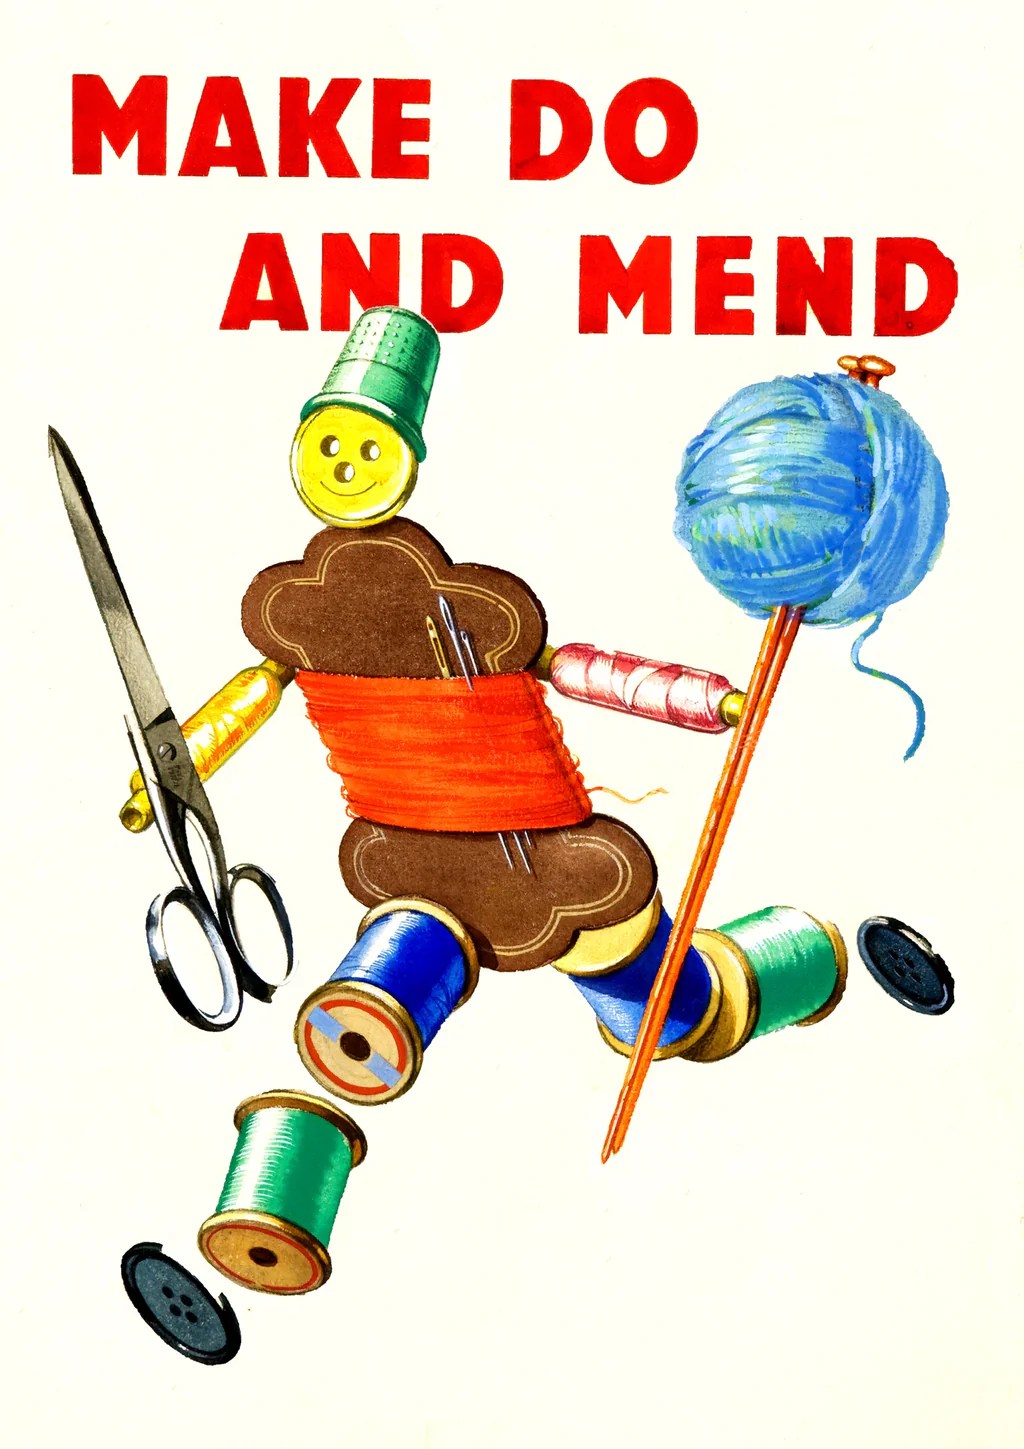
10 Tips for Starting a Small Creative Business

Zeens and Roger. My small creative business is crochet design.

Get Yourself a “Side Hustle”

I have a Small Creative Business as a crochet designer. It’s called Zeens and Roger (two of my nicknames). To some this is considered a “side hustle” but to me, it’s the part time job that I love. It’s all of my own making and, don’t tell my boss but, I prefer it to my real, non-crochet job (with its guaranteed income).

People I know consider my woolly obsession to be more of a hobby. But if I can earn an income from it, albeit a relatively small one, to me it is a bonafide job. It feeds the yarn habit too. Money goes back into the industry, supporting other small creative businesses, like indie dyers, who I give all my money to so I can buy my body weight in colourful skeins of merino.

Check out my post on how I became a crochet designer. I also put together a couple of Youtube videos: Get Your Crochet Designs Published and Publish Your Crochet Designs.

Crochet Design and Marketing Experience

Whilst my small biz is all about crochet design, I reckon a lot of the top tips below are relevant to many creative “side hustles”. The advice is based on my own experience for ways of increasing sales in my creative business. It’ll guide you towards setting up your own small business side hustle if you haven’t already started.

It is not a major, deep dive as they are all extensive subjects in their own right. However, a simple overview will be a nice and gentle introduction here. I know very well how difficult and overwhelming it can be to start when there is so much info out there.

Top Tips for Your Small Creative Business

Get Featured in a Magazine

I was inspired to write this blog post because I was interviewed for a recent issue of Inside Crochet magazine about being an entrepreneur and having a “side hustle” creative business. I would be missing a trick if I didn’t also share my experience of working as a freelance crochet designer here!

I love the working relationships I have with craft magazines. My work has been featured many times now and I get excited each and every time publication day comes along. Not only do you get to see your hard work show up in print, so does everyone else. it’s a genius way of getting known in your specialist field.

Perhaps you’ve already read how I started as a crochet designer. Essentially, I bit the bullet and contacted my favourite magazines asking to be featured. No point waiting for them to come to me! I say it so confidently now, but at the time I was bricking it. Putting yourself out there is hard but you can do it!

Learn About Small Business Marketing

Marketing is a huge subject and I’m no expert. However, I have picked up knowledge by trial and error. Marketing is a big investment of time (and sometimes, money). Crikey, all of these things are! But you can encompass it into your daily/weekly/quarterly work routine.

For me, a lot of marketing is about getting to know my audience through social media. Like, who are my customers? What do they like about my crochet designs and my brand? I used to be terrified of talking to people online but I find it much easier now. It’s massively important to be entirely yourself because trust is important, customers can definitely smell the stench of nonsense.

Personally, I hate marketing ploys being shoved down my throat. Then I have to remind myself that I am not my customer and just because I’ve seen my work quite a lot, it doesn’t mean that my customers have. So what if I shared the same picture on Insta three times over the last 18 months! Not everyone saw it the first or second time. Sometimes, reminding folks about a popular design or product isn’t going to feel forced at all. It’s gentle promotion, I guess.

One of the most fun things I did to market Zeens and Roger was answer a Facebook post asking for artists to display their work in empty highstreet windows. I got a very sweet spot to showcase my crochet designs, just in time for lockdown March 2020. People still saw it and I got a lot of emails, even during peak quarantine days.

Showcasing crochet on the high street.

Write Newsletters

Um, I am useless at turning up for this and much to my detriment too. Despite being a Newsletter chump who has only set up basic campaigns and then managed to send ONE Newsletter, I know without a shadow of a doubt that a direct bulletin to people who want to know more is massively valuable. This is a marketing tool that is super buzzy right now. Everyone is encouraged to write a Newsletter so that you can point customers to where your stuff is.

Please can someone kick me up the bum and tell me to write more Newsletters from my creative business please?!

Become a Pinterest Whizz

Oh Pinterest, how I love thee! Pinterest takes long term commitment to get people pinning your lovely images. For the longest time, I didn’t pay this platform enough attention. And it showed. Then, about 18 months ago I signed up for a series of free Pinterest webinars. I learned that whatever I had been doing was terribly old school. I had not kept up with the pinning times. As soon as I linked my website to my Pinterest account, and once I knew how to create pins on Canva, I was off!

The pic below is a typical Pin that does pretty well.

Some Pins take off immediately, some are a slow trickle of attention, and many pins fall flat on their face. A mix of all three has been my experience, and I’ve seen my small audience go up from a couple of hundred to a couple of thousand in just over a year. Perhaps you don’t think that’s a lot but it’s a decent start. I’m happy with that. And even if images don’t get pinned, I can see from my blog stats, that I still get a lot of visitors because of Pinterest.

An example of a Pin for Pinterest. A good way for a small business to get spotted.

Be Consistent in your Work

Show up for Instagram. Show up for your blog. Show up in any of the places you’ve decided to focus on for your creative work. The amount of times I have seen people set everything up, to then sit back and expect miracles is crazy.

I’m definitely guilty of neglecting some elements of the behind the scenes work because life really does get in the way and that’s OK. It’s important that none of us give ourselves a hard time on this. However, you can nearly always see the difference in stats between sitting back and doing bog all, and sitting down at your desk and writing a blog post or creating a handful of Pins, or whatever.

Evaluate what needs changing and make little improvements. No need to go in all guns blazing cos that’ll backfire too.

Your Crafty Skills are Valuable

Something you know already: Exposure doesn’t pay the bills! The reason you’re reading this is because you have a talent that you believe can be turned into a bit of a money spinner. Doing stuff for free won’t help with that. I have learned this by accepting “gifts” in exchange for reviews. They are never gifts, something is expected in return.

No, I won’t do 2 Instagram Posts, 4 Stories, 2 Reels, a blog post and YouTube review for your three balls of fancy new yarn. But you can pay me for those things! I swear big brands know to target smaller and up and coming creative businesses because they know those are the ones who will jump at an “amazing opportunity”

I’m contacted on a reasonably regular basis asking if I will do the influencer thing. Nine times out of ten, I won’t as I know it devalues a maker’s time. It’s exciting to hear from well known brands but in the back of my mind is the knowledge that they have huge marketing budgets and that money doesn’t filter down to talented creators, needing to be paid for their work.

Just to add, I’m not a misery guts. There are times when there’s a positive gut feeling and I jump on board for a collaboration.

A colourful crochet sweater pattern called Milis. Featured in specialist crochet magazine, Moorit .

Blogging for Your Small Business

The longevity of blogs is incredible. The power they still have has blown my mind a little bit. At one point I remember everyone predicting the death of blogging but nope, it has shown amazing staying power.

I started my blog for a number of reasons. Firstly, I wanted to record the things I crocheted and secondly, had a vague notion that perhaps I could earn money from it if enough visitors stopped by. A big dream was to sell designs too. As a total novice, I learned new skills just by having a go. Funnily enough, the skills I learned from blogging had an influence on getting my first “real” job back in the workplace, after being a stay at home parent for ten years.

Monetize your creative blog when you start seeing the traffic picking up. Are you able to attract visitors by offering freebies? Mostly, I like to offer free crochet patterns that are relatively quick and easy. That way you’re not spending more time than it may be worth. I also enjoy blog posts about crochet related techniques and tips too. That way, crocheters who make my patterns can also discover some snazzy tricks and advice too.

Don’t forget that SEO (Search Engine Optimisation) is where it’s at for bloggers. It’s more than just keywords and my understanding of SEO grows year on year. I used to be a very lazy blogger so every now and then I spend the time going over old blog posts to make them SEO relevant, make sure the links work and actually answer questions about crochet rather than assume people know the same things I do.

I also use a plugin called Yoast to help me make sure I hit all the SEO things I need to hit.

Try YouTube Vlogging

If you have the time for recording content such as podcasts and tutorials (and then putting it all together via the power of editing software) this could be for you. All the Youtube video making takes time but you find a whole new audience. Be aware that to make YouTube work for you, you need to be present regularly. I couldn’t commit to once or twice a week so have taken a step back for now. You need a lot of views to bring in income but if you enjoy talking about your small creative business then this is a great option.

I miss my YouTube channel a lot and if I could, I would be there every week, making all the crochet videos!

Fancy being a crochet designer? Here's ten tips for starting a small creative business based on my experience of making it up as I go!

Build a Network of Friends

Sometimes, running a small business can be lonely. This is one of the reasons I haven’t quit my day job as I like working with people. My job as a crochet designer can be pretty solitary. Sharing the experience with friends and peers who have similar creative businesses can make a huge difference to how you feel about your work.

A lot of negative stuff can be said about Instagram but I have made genuine friends by being on that app. I love that you can go to a yarn festival on your own and bump into someone you know and have a great old gasbagging session. I love that I have even been on holiday with my crochet pals.

Whether you’re having a catch up over cake in real life or a chinwag on Zoom, I greatly value these awesome friendships.

Get Small Business Advice from the Experts

You can get loads of free small business advice online and it helps to know where you can find specific resources. Webinars, courses or subscriptions sometimes have a small cost associated with them. I’m happy to spend the equivalent of a few pattern sales to gain access to superior knowledge. They are fantastic investments. To be honest you can spend hundreds on signing up for courses etc but you can pick and chose what ones work for you.

Keep your eyes peeled on social media too and discuss with your network of crafty friends to find out what’s going on in the community. This is where I have discovered many helpful courses to do with marketing, Pinterest, SEO etc. In fact, this weekend I’m attending an online copywriting course!

A list of People and Places to help with your Creative Business

  • Studio Cotton: Aime shares a tonne of expert advice on small creative businesses.
  • Sara Tasker AKA Me & Orla: I particularly enjoy her Hashtag Authentic podcast.
  • Indie Roller: Lots of positive encouragement about selling your work from Leona.
  • The Design Trust: A Business School for creative professionals.
  • Inspired To Write: Amie McNee, a Creativity Coach who is relatively new to me but I like what I see.

These are just a few. The top two are my faves and work with how I like to run my crochet biz. Is there a resource that you swear by?

Working with brands like Hobbycraft  elevates my creative business.
Filming the Mixtape Medley CAL for a Hobbycraft collaboration.

Well, lordy, who knew a creative business person wore so many hats!!

By the way, please don’t let this list worry you. It’s not all done in one giant whammy. It is very much a one step at a time kind of thing. Pick and choose what to tackle first and take your time. Don’t give up too soon either, it’s a long-game and with patience, you’ll see changes start to happen.

Also, a caveat. I made this list up based on what I fumble my way through. The list is not exhaustive and perhaps not what my peers do. There are loads of other ways to wing it as a small creative business person but I hope this offers some kind of starting point. It’s not really possible to cover everything in one blog post. I’m pretty sure I’d end up with a book if I tried to talk about it all!

As always, let me know if you have any questions, I’d love to hear from you.

Cheers.

My ten tips for starting a small creative business based on my experience of making it up as I go!

Blue Granny Square Sweater

Crochet Granny Square Sweater from Zeens and Roger

Crochet your Own Sweater!

So good I made it twice, here is my second Granny Square Jumper!! I’m here to write about it again as, not content with leaving things as they are, I made adjustments which I think you will find useful.

If you haven’t seen my first post about how I made a super colourful version (with lots of fabulous yarn stashbusting), you can find that HERE, on a post imaginatively titled Granny Square Sweater. That’s where you will find the original recipe on how to crochet a jumper of your own. I also created a crochet video tutorial to show how to put everything together.

If you’re a beginner crocheter, you can make this sweater with the resources I have provided. However, it’s not just some granny squares stitched together. There is shaping (at the shoulders and sleeves), nice ribbing, and techniques that will up your skill level.

If you like this granny square sweater, perhaps you’ll like my other crochet ideas. Please peruse my free crochet patterns page. And if you really really like what you see, you can buy me a Ko Fi! Although, it’ll most likely be tea because I’m not a coffee drinker…

Colourful stash busting granny square sweater.
My stashbusting original Granny Square Sweater

What’s Changed?

Ok, so, it would be easy for me to say that this is just the same jumper as my original stashbusting sweater but that’s not technically true. Here are the things that I tweaked:

  • I used different yarn – a merino DK held with mohair lace weight.
  • I only used two colours.
  • The main body granny squares are smaller, allowing me to add width later by using a few rows of granny stripes at each side. This also made room for a slightly deeper neckline because….
  • I changed the shoulder tabs – fronts are longer than the orginal, and different to the back tabs.

The plan for this blog post is to talk you through these changes so they’re not scary. I have drawn up some rudimentary charts, which will help visual learners, and hopefully I won’t bamboozle you with information overload!

Black and Blue granny square sweater from Zeens and Roger

Using Mohair Yarn

As I’ve mentioned above, I used different yarn to make this black and blue fluffy jumper. The original is made with aran weight yarn with wool content. Rather fortuitously, my gauge is the same.

Whilst this black and blue sweater/jumper was also intended as a stash buster (using yarn I had leftover from other projects), I wasn’t sure there was enough of the black so ordered more. I vastly overestimated and have ended up with the same amount that I started with. A little bit more, in fact. So much for stash busting!

If you’re daunted by the fluffy stuff, fear not, read my blog post with some top tips for using mohair yarn. Ultimately, please don’t be scared. This is actually a really good project for mohair yarn because the stitches and design are simple. And holding the mohair with a non fluffy yarn, eases any anxiety too.

I used Drops Kid Silk, I had loads of Cobalt blue in stash from a neglected then rejected design idea.

Merino DK Yarn

I chose to use West Yorkshire Spinners Bo Peep Luxury Baby DK (double knit). The black (Incy Wincy) is leftover from a knitted jumper that went into a Vivienne Westwood inspired Sex Pistols jumper that was the husband’s Christmas present (I didn’t knit it, I asked MiL to do it!). There was leftover Drops Kid Silk black mohair from the same project as well.

More blue (Space Hopper) was purchased as I think I only had one ball in stash. This shade went beautifully with the Cobalt mohair.

I sometimes find that merino can be quite heavy, this one is lovely and light (probably because it’s a nylon mix). It doesn’t create a cumbersome jumper, which can be a bit much for an item of clothing.

Two Colours of Yarn

As a stashbuster, the choice of yarn was made for me. I didn’t have to worry about colour because black and blue were what I had and that was that.

The best thing about only using two colours is that for the main squares, you can float the yarn. No snipping, no time spent sewing in loads of ends, huzzah! Obviously, float along what you decide is the wrong side of the granny square.

I’ve worked out that for this jumper (an approximate size 3), I used:

  • 7x50g blue DK
  • 5x50g black DK
  • 4x25g blue mohair
  • 3x25g black mohair

As a general rule, every 100 grams of the DK merino uses a 25 gram ball of mohair. However, meterage is 112m per 50 gram ball of the DK (therefore 224m per 100g) and the meterage for the mohair is 210m per 25g ball. There’s a little bit of an imbalance so an extra ball of mohair is a good idea, to make up the shortfall.

The amount needed will vary depending on the size you make and how much adjusting you do. You will need more than me if you’re making a larger size. I have not done the maths to find out precisely how much for each size.

Float your yarn
Float your yarn

Cropped Granny Sweater

Two large granny squares are the basis for the main body panels of both sweaters. For this version, the two main squares are four rounds fewer than the colourful jumper. This is so the final sweater doesn’t have the length of the extra rounds but it has the width because I add granny stripes to each side of the front square.

Front and back granny squares have 19 rounds. The front square then has 5 granny stripes at each side. 19+5 is equivalent to a 24 round square for the width, which is one round more than version 1 (cos, why not?!). I added the shoulder tabs to the top, working into gaps between stripes, and gaps between clusters. See pics and charts below.

The back doesn’t have separate side stripes, instead, I crocheted around three sides of the square five times to get the same amount of extra sides and also add it across the top too. Hopefully this is not gobbeldegook!! It’s difficult to put into words but I think the charts are my saviour.

You can use the maths from the original post to work out gauge and measurements if you’re not keen on eyeballing.

Front panel
A pic highlighting how the front panel is put together. Granny Square, side stripes, and shoulder tabs.

Shoulder Tabs

If you make a sweater with the more basic elements, like I did for the original, by the time you’ve added shoulders and a waistband, the sweater is longer than it is wide. For version no.2 I wanted a more cropped style. In order to achieve this there are the additional steps, discussed above. They are arguably more tricky to wrap your head around but I absolutely love the result.

The first jumper has the same number of rows for both front and back shoulder tabs. It’s super easy to do it this way because it means you don’t need to think about maths and stitch placement too much.

However, what would happen if you attached different length tabs (front v back) to main body granny squares? Let’s say 8 rows for the front tabs and 3 rows for the back tabs. Your front body panel would be 5 rows longer than the back panel. This difference needs to be accommodated.

Below I have included the basic charts. I think they are the easiest way to show you all the shaping shenanigans. The charts are truncated so they show you the intention without literally showing every row. The real life jumper has 8 rows of front shoulder tabs (repeat the last two granny stripes rows of the chart to get 8) and 3 rows of back shoulder tabs (samesies as the chart).

Shoulder Tabs Clusters

The important bit is that shoulder tabs should end up the same width across at their last rows. Or thereabouts. I don’t think it matters if there is one stitch difference (mine were!). If there is more of a difference then it might be worth going back to the drawing board.

FYI, My shoulder tabs end measuring approx 16cm.

To begin, the first row of my front tabs has 7 full clusters, plus the end stitches. After four rows of shaping/decreasing and four rows of even granny striping, the tabs end with 6 full clusters and 1 stitch either side = 20 stitches.

The back tabs start with 6 full clusters plus the ends. These tabs are only three rows but because of a little manipulation/decrease at the neckline, I ended with 5 full clusters and 2 stitches at either end, that’s 19 stitches. I’m happy matching 20 stitches to 19. You can’t tell on the finished garment.

However many clusters you choose to add, make sure the width (no. of clusters per tab) isn’t going to create a massive neck hole.

Black and blue granny square sweater

Front Main Body

The first chart (below) is for the front of the jumper. Make the granny square first, then join as many stripes you want to either side. That’s the black and blue section of the chart. Then work the shoulder tabs. I have only shown one tab here but it gives you the picture of what you need to do for both. Don’t forget that more is explained in the colourful granny square sweater post, go check it out.

Back Main Body

The second chart shows the back. Now, here is where it gets more than just a tweak, we’re making different adjustments to ensure everything is the same size and will fit together. You can see that rather than working some side stripes, the chart shows three worked sides of the square (chart has three rows/rounds, in real life I did five). This is to accommodate the different lengths of the front and back shoulder tabs. So, five additional rows along the top of the back, plus 3 shoulder tab rows = 8, which equals the same as the front tab rows.

Crikey, at this point, I feel like I need to say “Thaaaat’s Numberwang!”

Granny Stripe Sleeves

Sleeves remain the same, thank goodness! But because they are stripes, you still have loads of ends to sew in. I started using the ends to sew the sleeves together but it was a major faff so decided to sew them all in first and then sew together using a length of the DK. There’s no need to use the mohair as well when you’re sewing your pieces together.

Ready to Wear Crochet Sweater

And everything else is the same! When writing out the differences it feels like it’s quite complex but in real life, once you have the hook in your hand and the yarn gliding through your fingers, it’s actually a lot simpler. In no time whatsoever you’ll be wearing your new handmade jumper! And it will look great!!

Please share your makes on Instagram by tagging me @zeensandroger and using #ZeensAndRoger

Also, there’s Ravelry too. Adding your project there is super helpful as it helps others see what designs look like when made by others.

Crochet jumper schematic
Granny Square Sweater
Granny Square Sweater Pattern

Self Striping Crochet Wrist Warmers

Striped crochet wrist warmers

Crochet Wrist Warmers

Last year I bought some self striping yarn, totally on a whim. I thought that perhaps I would finally learn how to knit socks. Haha, that’s never going to happen (I want to, I just don’t have the time). Instead, the colourful yarn sat twisted in its skein and waited.

I have seen the Mind the Gap yarn many times before, beautifully knitted up in colourful, stripey socks, in hues that are taken directly from the gloriously higgledy-piggledy London Underground map design. All the Tube stations are represented in bright, cheerful colours, which clash brilliantly in ways that make me very happy indeed.

Intrigued as to how it would look when worked up in crochet stitches, I figured a quick fix project was the way to go. Given that this particular self striping yarn has colour changes that are designed to be showcased in something small like socks, and given that I am not yet a crochet sock convert, the obvious answer was to make some crochet wrist warmers.

Before you read on, don’t forget to check out my other free crochet patterns. Let me know your favourites!

Self Striping Yarn

I confess that self striping yarn doesn’t often capture my attention. I’m not usually a big fan of the stuff. The colour changes are decided for you and that means there’s limited control. My preference is to be able to control all the elements of my designs so I rarely reach for skeins or cakes that do the job for me. However, I think a lot of people would disagree with me and would like to have that decision made already. Fair enough. Essentially, it removes the stress of choosing the colours. I guess, in that sense, it’s a more mindful way of crafting. Plus, no ends to sew in!!

With the Mind the Gap yarn, it’s intended as a sock yarn and that means the colour changes are placed at deliberate points to create evenly balanced stripes for socks. If you’re a sock knitter, there’s guidance on the label for making the most of the stripes but seeing as I am here with a crochet pattern, it didn’t apply to me and my intentions. But it is very helpful to have that info on the label. A nice touch!

I used the self striping yarn for the main part of the wrist warmers. The stripes do jog a little bit here and there because it proved very difficult to be precise. Due to tension and the slight variations in each stripe, jogs are inevitable but I think that’s absolutely fine here. I actually took the time to measure a few of the stripes to see how long each colour change was. I measured four different changes (by hand, so it’s not an exact science), I got 418cm, 405cm, 407cm and 430cm. So you can see, there’s little bit of variation in this beautiful hand dyed yarn.

Crochet Wrist Warmers Pattern

The pattern I came up with is pretty much just a tube to wear around the wrists. This tickles me way more than necessary. I have made tubes out of the Tube map!

As the colour changes were out of my control, I thought I would also change other elements of the design that I might not ordinarily include either. Therefore, I did something I don’t normally do and that’s to just work around and around without joining. Working a tubular spiral of colourful crochet was actually really good fun!

I also did away with a thumb gusset. I wondered if this would be a disadvantage to the wearability but, no, I have worn my wrist warmers a lot since I made them and not once have I missed having a separate thumb.

So, yes, these are very much just tubes as wrist warmers! However, do note that I added a couple of increases to accommodate for the widest part of the hand. Feel free to play around with these increases. Perhaps you have wider hands than my smallish paws. In which case, add another couple of stitches at different points.

These crochet wrist warmers are very simple but very practical and fun to make. I hope you think so too.

You Will Need:

  • Less than one skein of sock weight yarn for the main colour. I used aprox 35 grams of Mind the Gap by Trailing Clouds, which I bought from Etsy. This sock yarn is 75% Bluefaced Leicester, 25% nylon and 425m/464yds per 100 grams.
  • A mini skein of complimentary colour. I went for an orange I found during a deep dive for stash. I don’t know why but for the very first time in my life I am well into orange. It has never happened before! Weird. Orange is fast becoming a favourite colour!!
  • I used a 2.5mm crochet hook. This yarn is a fine sock weight so you need a small hook. Sorry about that.
  • 2 stitch markers to indicate increase placement.

Tension

My wrist warmers haven’t been washed or blocked but I have worn them several times before any of the measurements were taken. Therefore they have stretched out a little bit. In pattern, 5cm measures = 10 rows/13 sts.

Measurements

Circumference at wrist: approx 17.5cm
Circumference at hand: approx 19cm
Length: approx 21cm

These are the measurements for the crochet wrist warmers and there will be some positive ease at the wrist blending into a little bit of negative ease at the top of the warmer. If you check out the photos you can see that this isn’t extreme.

Abbreviations & Crochet Terminology

ch = chain, BPtr = back post treble (US BPdc), dc = double crochet (US sc), FPtr = front post half treble (US FPdc),
htr = half treble (US hdc), sl st = slip stitch, st(s) = stitch(es), tr = treble (US dc), rep = repeat, yo = yarn over

Special Stitches

Foundation Treble (US foundation double)

This is an alternative to beginning with a chain. It creates a neater, more elastic start to the ribbing. 

Ch4 (counts as a st), *yo, insert hook in 4th ch from hook, yo, pull through, yo, pull through 1 loop (this creates the space you’ll work the next stitch into), yo, pull through 2 loops, yo, pull through 2 loops; rep from * working the next ftr (foundation treble) into the created space and loop behind it.  

I have a Foundation start video tutorial on how you can do this. Instructions for foundation tr begin at 6:45. Continue watching to the end as I show you how to join and begin working the post stitches for a cuff.

No, I don’t know what’s going on here either!

Pattern Notes:

  • The main section of the pattern is worked in the round with no joining.
  • This pattern is for one size. It’s worked in multiples of 4. Adjusting by 4 sts will add or subtract just under 1.5cm. 
  • An increase is 2 stitches in the same place.
  • The pattern is written in UK terms. Check out the Abbreviations section above for US terms in brackets.

I started with a foundation row of UK treble stitches (That’s US doubles). I have a video tutorial to show you how (see above in Special Stitches).

Wrist Warmer Pattern

Make 2
Rnd 1: 44ftr, join with sl st to form a ring, do not turn.
Rnd 2: 1ch (does not count as st here & throughout), [2FPtr, 2BPtr] around, join with sl st to first st, do not turn.
Rnd 3–5: Rep Rnd 2.
Rnd 6 – 23: Begin Rnd 6 with 1ch, htr around, I worked in a spiral without joining the rounds.
Rnd 24: Work an increase and place a stitch marker, cont with htr until half way through the round, work another increase, place marker, cont in htr around. [46 sts]
Rnd 25: Cont working htr in the round.
Rnd 26: As Rnd 24. Place the increases above where the stitch markers are placed. [48 sts]
Rnds 27 – 33: Cont working htr in the round. 
Rnd 34: Cont working htr in the round. As you reach the last colour change on the self striping yarn work 3 dc, 1 sl st. Join the contrast ribbing colour on the sl st.
Rnd 35: 1ch, tr around, join with a sl st to the first st.
Rnds 36 – 39: Rep Rnd 2.
Fasten off and sew in ends. Use the tail to sew the ends of Rnd 1 closed.

In the photo above you can see that the stitch markers are equidistant. I eyeballed this as it’s just about creating extra space for the wider part of your hand rather than making any special shaping.

Voila! Finished Wrist Warmers!

And there you have it! Two super straightforward wrist warmers that are essentially just tubes of colourful crochet!

Don’t forget to add your finished projects to Ravelry, I’d love to see you crochet wrist warmers! And you can also share on Instagram tag me @zeensandroger. Also, you can use #zeensandroger too and I have also seen #Mindthegapyarn

Granny Square Sweater

How to Crochet a Granny Square Sweater

I didn’t mean to make this granny square sweater! Honest! I have other projects to work on but bright colours and my favourite stitch called to me. This quite often happens. I have a list of designs I “should” be working on when something else catches my eye. Usually, it’s quick and easy makes because I’m craving mindful crochet rather than brain-busting designs.

So, that’s where this granny square sweater comes in. I have just finished an intense commission which involved a lot of head scratching maths. Anything with the granny stitch is a counteractive remedy to the hard stuff so, because I have a very frazzled brain right now, this is a relatively basic “recipe” rather than a full on graded pattern.

It’s not quite as evil a recipe as on a Bake Off final, by which I mean, I do provide plenty of information! However, I haven’t written a round by round, row by row pattern. With my helpful video tutorial and charts below, you won’t need them.

It’s an eyeballing, intuitive project, that you can make up as you go along without worrying about getting the calculator out.

If you enjoy this blog post and the accompanying tutorial, perhaps you’d like to buy me a ko-fi! Thank you, you’re a superstar! You can find more of my Free Crochet Patterns HERE.

Watch the YouTube Tutorial on How to Make a Granny Square Sweater

And, you can read about my Black and Blue Granny Sweater HERE

TLDR

If you don’t fancy reading all the detail below and you are pretty crochet confident, this is it in a nutshell…

  • Get loads of different colours of aran weight yarn and a 4mm or 4.5 mm hook.
  • Make two granny squares in a size that are a similar width to a favourite jumper already in your wardrobe.
  • Add shoulder tabs (charts below).
  • Make two sleeves (charts below)
  • Sew together.
  • Add ribbing (either before or after it’s all sewn together).
  • Wash and block.

Watch the YouTube Tutorial on How to Make a Granny Square Sweater

Winging It

This “recipe” for my granny square sweater is for those who enjoy a laid back kind of project. I would love for you to have the confidence to make it up as you go. Play with placement of increases for sleeves, explore ways of basic shaping. Add length, add width. Shoulder tabs can be different too. Don’t like my crochet ribbing? Try a different one.

However, there are techniques here that will improve beginner crochet skills. The ribbing is fancier than a bog standard one, it is also attached with a Join-As-You-Go technique, which I love. There are shaped shoulder tabs for a nice neckline, and the sleeves aren’t just straight tubes. None of these things are set in stone. You can do what you want.

Also, the more you mess about with crochet by winging it, the more you understand the fibres you work with, and how crochet stitches behave. Crocheting your own clothes will become easier and your skills will grow. Therefore, just get started with experimenting and playing…

A colourful crochet Granny Square Sweater by Zeens and Roger.

Stashbusting Yarn

Let’s start with the yarn. I have lots of colourful aran weight wool leftover from a few different projects: My first garment design, the stripey Perfect Cardigan, All the Fun of the Fair, which is a granny stripe cowl/snood, and the second JW Anderson inspired cardigan I made for my sister. Plenty of colours in this lot! And it’s what I used to make my sweater.

I would say that 95% of stash used here is Paintbox Worsted Superwash (200m per 100g) and Paintbox Wool Mix aran (180m per 100g). There are a couple of other brands in there too. They have slightly different yardage/metreage but in the final jumper, you can’t tell. My fave is the wool mix aran, it’s much softer than the worsted superwash.

What Fibre?

You could use other yarns and fibres if that’s what you have in stash. The beauty of this jumper is that it is adaptable. Ultimately, the main body is a granny square so you just make it until it’s the right size. The sleeves would require more faffing but I quite enjoy the tinkering to get them just how I want them. More info on sleeves is further down the post.

Using acrylic? It’ll be grand for a few wears and washes without blocking (instead, use fabric conditioner and tumble dry so it doesn’t come out squeaky). Just know that it will grow and stretch a little bit upon wearing it. Usually, it’s not a drastic change but eventually, over time, acrylic sort of gives up and becomes flatter and more plasticky than its original fluffy self. That’s my experience anyway.

Using cotton? I can’t give much advice on a cotton version I’m afraid as I never make cotton garments. It’s just not my bag. There’s no bounce in the fibre. It stretches and drapes differently to wool and, so far, I’ve not required that for my designs. If I’m making a jumper I want warm wool. You may wish to make swatch to try it out (see below).

Granny Square sweater by Zeens and Roger

Choosing Colours for your Crochet

Yarn amounts (stash, leftovers) may have an influence on where you place the colours. The more colours you have, the more higgledy-piggledy and awesome it’s going to look. The fewer hues, the more “arranged” it will look. There are about 24/25 colours in mine. Some colours only feature once or twice as were only a few grams left of them.

I had the stash and balanced it all out following my gut. A couple of tips: don’t put all your brights together and evenly place the darker colours throughout. You can read more about how to choose colours for your crochet in another of my blog posts.

How much stash have you got? Use the smaller amounts early on in the squares, have you got enough for a sleeve row? You only need small lengths for the shoulder tabs too. Think about where to use the yarn in clever ways.

How Much Yarn do you Need to Crochet a Sweater?

How much yarn will you need to make your Granny Square Sweater? Oh crikey, how long is a piece of string? It depends on so many factors! The biggest one, however, is it depends on the size you’re making. There’s more info on sizing further down.

Most of the yarn I used is from Paintbox Yarns (aran & worsted, as I mentioned earlier). The worsted is 200m per 100 grams. I’m going to use this to work out how many metres I used. My jumper weighs about 810 grams, which means I used approx 1620 metres. You get this figure with the following equation: weight of the garment divided by the weight of a full ball, multiplied by the meters (or yards, if you prefer) in one full ball. Note that you will probably need more than this in reality as it’s made up of around 24 colours and you’re going to use various amounts of each.

The problem is that as it’s lots of leftovers, of many different colours, giving amounts for other sizes is difficult. Even giving specific amounts for the size I made is nearly impossible because I made no notes on my stash. Eek, sorry. But if you’re a hoarder like me, you’re gonna have loads of stash to use, yes?!

All I can give you is this, if you want to have matching ribbing on the cuffs, waistband and neck, ensure you have at least one full 100 gram ball of yarn for that. Maybe get two balls to be absolutely sure because I probably used approx 1 full ball of green but haven’t worked out how much exactly cos in my stash it was two partially used balls and some went in the main body of the jumper as well). Sorry again!

Zeens and Roger crochet design. Granny Square Jumper

How to Size your Granny Square Sweater

So, as you know by now, this is a recipe rather than a fully graded pattern, which means you might need to do some work! I will help you as much as possible here. And I will make sure it’s not painful. However, we are all making unique versions, right?

The absolute easiest way of making a jumper that’s going to fit you is to dig out your favourite fitting jumper and use that to work out how big to make your square. Take into account that your granny square sweater will stretch with wear (whether you’ve blocked it or not). Therefore, when I made mine, I made it approx 2 cm smaller than my favourite jumper, knowing it would stretch to become a similar size. There’s a slight risk of it stretching more than 2 or 3 cm but that’s ok for this project. We’re not after a fitted garment that’s super precise. This is a laid-back way of clothes making.

It’s worth mentioning, that the larger your square, the more it’s going to stretch. If each stitch stretches and you have more stitches, well, it’s going to make a difference. Fancy working up a gauge swatch, just in case?! Keep reading…

More Accurate Sizing

Ok, so I’ve popped this lil chart here as a useful guide to show a pretty standard width of a sweater with 10cm positive ease (positive ease = additional roominess in a garment, the opposite is negative ease, which makes a garment fitted against the body).

If you’re not sure about using your fav garment to measure against, you can always use this instead. You want your final granny square to be about this size in width. You can find more info about standard garment sizes on the Craft Yarn Council’s website.

Size1 (xs)2 (s)3 (m)4 (l)5 (xl)6 (2xl)7 (3xl)8 (4xl)9 (5xl)10 (6xl)
UK sizing46-810-1214-1618-2022-2426-2830-3234-3638-40
Width of granny  (cm)43.548.553.558.563.568.573.578.583.588.5

Sweater Length

At this point, you need to know that adding shoulder tabs and a waistband is going to add length to your jumper so the end result is that the sweater won’t actually be a square. Bear it in mind. With 4 rows of shoulder tabs and, just shy of 5cm for the waistband, my jumper is approx 57cm in length.

Granny Square Sweater by Zeens and Roger

Gauge and Blocking

To be totally accurate you may be tempted to make a gauge swatch. This is a good idea! You can check that your crochet tension isn’t wildy off from mine. Read about getting gauge on your crochet clothes here.

This can be intimidating, I totally get it. And, although I’m totally winging it, I do have a good understanding of how washing and wearing a garment can alter the clothes you make. This is actually big big subject and I don’t want to scare you off by writing a massive essay about it.

Blocking?

Simply put, blocking means to wash or steam your woolly items and then (gently or aggressively, depending on the situation) pin out to stretch the item as it dries. It will then be fixed in its new state. 

Spend a few minutes to work up a granny square that measures about 15cm (6 inches) and pop it in warm water (with a dash of detergent – I use wool wash soap for my handmade garments). Rinse, blot in a towel, then pin onto foam blocking boards and wait patiently for it to dry.

I didn’t mention it in the video tutorial but I pinned out and steam blocked my main pieces before sewing them together. It’s a really quick blocking method. I have a steamer but the steam function on an iron works too.
For me, this helps for more accurate sewing. The pieces are less likely to bunch or pucker.

The picture below shows what crochet looks like on the blocking boards. If you have a cat, it is pretty much guaranteed that they will want in on the blocking action.

Blocking crochet garments

Arghh, Maths! How Gauge Affects Size

I’m going to assume that you’ve read my quick blog post about gauge. My gauge for this project (after blocking) is about 8.5 rows per 10cm. If you don’t want to eyeball the granny square like did, you can use a formula to work out how big to make it instead. Using the measurement from your size in the chart above, multiply it by the row gauge (8.5) and divide by 10 (cos that’s how many centimetres get you 8.5 rows).

It turns out my eyeballing is surprisingly accurate. Check this out: 53.5 (size 3 as per the size chart) x 8.5 / 10 = 45.475. I worked 23 rounds of grannies. 23 x 2 =46!! Wowsers! (I’ve multiplied by 2 because we go around in a square, not rows. From the granny’s centre to the top, it’s 23 rows, from the centre to the bottom, it’s 23 rows).

And I know, I know I said you wouldn’t need a calculator. sorry about that. But technically it’s true if you’re winging it!

Granny squares
crochet granny squares

Make Your Granny Squares

You probably already know how to make a granny square but if not, I show you how in the video tutorial. I like to turn mine every round so that there’s no dreaded twist.

Once you have two granny squares that are the chosen size, add shoulder tabs to the top. I also demonstrate this in the vid. It’s a Granny stripe method with a touch of shaping so that the neck is a nice, rounded shape. See below for the charts.

On the bottom of the granny squares, work a row of UK dc (US sc) stitches. This is the base upon which you’ll work the waistband ribbing. Use the same colour that you’ll use for the ribbing.

By the way, at any point during this process, you’re going to have to sew in the eleventy bajillion ends. Hahahahahaha! Quite honestly, looking back, I don’t know how I did it without crying.

Add Shaped Shoulder Tabs

This is the next step beyond the most basic of boxy crochet garments. There is absolutely nothing wrong with basic square shaping for a crochet sweater. I make ’em sometimes. But here, let’s go one step further and add shoulder shaping. This creates a scoop neckline, which will sit nicely across your clavicles!

Of course, this is open to adapting in different ways. To keep it simple I have kept the front and back the same. I won’t mention too much more on this because I demonstrate how you can tweak this in another version of this gloriously colourful granny square sweater. Find out more in my Black and Blue Granny Square Sweater post.

Below is a chart showing the tabs attached to the main body (the granny square). I chose to add four rows for mine. You have the left and right tabs there. I should have drawn them mirrored. I didn’t. Oh well, it is still very useful to see them visually.

And by the power of Photoshop, it should look like this! Sort of…

Sleeves

Crochet granny stripe sleeves

Ok, so you’ve got the main body done. Now for the sleeves. They’re worked flat, in rows.

I want shaping here, very basic shaping. Luckily, arm length can stay the same regardless of the size of the main body so what I’m sharing here is going to work for the majority of folks. Of course, it’ll be different if you’re not using aran or worsted yarn. Obvs, things will vary if your tension is different so work more or fewer rows if needed.

My sleeves measure 46cm without cuffs, I worked 41 rows. Decide how long you want your sleeves and work as many rows as you want. And don’t forget that the cuffs add to the length too. They are 4cm so in total, I have 50cm length sleeves. This works for me and my arms. I’m a fan of 50cm sleeves!

Sleeve Width

Begin by working a foundation row of UK double crochet (US single crochet) using the ribbing colour. Check out my video tutorial for the foundation start. You need multiples of 3 plus 1. I worked 43 stitches for the beginning of my sleeves. After the first row of grannies appear, it measures approx 27cm at the wrist, and after you’ve worked 41 rows, the width at the other end (upper arm) measures 40cm. You might need to make yours narrower or wider than mine. Add or remove multiples of 3 stitches to change the sleeve width. Treat every 3 stitches as 2cm, so you’re adding or subtracting 2cm if you change the stitch count.

If you worked 43 stitches, the first row will have 13 granny clusters, plus the two ends.

Then add the JAYG cuffs. To be honest, you can add ribbing before or after you’ve constructed the jumper. I wanted them blocked at the same time so added them before. I’m not sure if I’d do this again but it worked in the way I wanted.

Next is a pic of the sleeve chart. Sorry for the hand-drawn nature of all my charts in this post. It was the quickest way of doing it!

Crochet chart  for sleeves

Below is a not particularly tidy way of demonstrating where I put the increases at the ends of each row. There are more regular increases at the beginning before I decided I didn’t need as many to get the shape required. Play around with increases as much as you desire to create different sleeve shaping.

Only after making this chart did I realise I only crocheted 41 rows not 42. Oops.

Crochet Ribbing

I decided to add ribbing for the cuffs and waistband before sewing the pieces together. I was happy with my measurements of everything and knew I wouldn’t need to make further adjustments. If you’re not sure, add these after you have sewn the main pieces together. That way, if you need to adjust the depth of the ribbing, you only need to undo those sections and not the whole thing. I added the neckband once everything else was constructed.

For this granny square sweater, I opted for my current favourite crochet rib stitch. It looks fabulous and is an interesting technique that’s more sophisticated than basic rib stitches. It’s still Back Loop Only, like a lot of ribbing but this time with a two row pattern repeat.

With the wrong side facing you, attach the yarn to where you want the ribbing and chain 8 for the cuffs, 10 for the waistband and for the diddy neckline, chain 6.

Working down towards the foundation/base I used a yarn over slip stitches (yoslst) and on the way back up on the next row it’s just a simple slip stitch. Once again, you can see a demo of this in the video tutorial.

As a written pattern, the ribbing looks like this:

Chain 10 (for example)
Row 1 (w/s): Working in back bumps, yoslst in second ch from hook, yoslst to end, sl st in next 2 sts of foundation row, turn. [9 sts]
Row 2 (r/s): Miss 2 sl sts, 9sl sts BLO, turn.
Row 3: ch1, 9yoslst BLO, turn.
Rep Rows 2 & 3 to end. 

Sew Everything Together

Remember to sew on the wrong sides to keep the right side as neat as possible. Use whip stitch, mattress stitch, whatever floats your boat.

1. Lay the front and back panels together (right sides together) and sew shoulder tabs together first.
2. Then, sew flat, the sleeves to the shoulders. Get them nicely lined up so that the centre of the upper sleeve is in line with the middle of the shoulder seam.
3. Fold everything in half and sew the sleeves and body in one fell swoop.
4. Add a round of UK dc (US sc) stitches around the neckband so there’s a foundation for the ribbing (matchy matchy with ribbing colour please).
5. Add neck ribbing (and cuffs & waistband if you left them to the end) and sew the ends to close.

Then, gently handwash and block if using wool yarn (yep, blocking again! I was thorough). The weight of itself should be enough to ensure it stretches appropriately. Once the excess water is gently squeezed out and blotted with towels, I didn’t bother to pin it out, just relied on the wet heft of it to stretch itself. [jeez, wet heft!]
If using acrylic, wash in a machine (not forgetting fabric conditioner to avoid the squeaky squeaky) and tumble dry.

Granny Square Sweater by Zeens and Roger

And there you have it. A Granny Square Sweater!! That was a lot of words, right?! Eek, my longest blog post I think.

Please do let me know when you make yours, I would absolutely love to see. Upload your project to Ravelry and tag me on Instagram. #zeensandroger

BTW, This post contains an affiliate link, which means, if you buy through the link I set up for Lovecrafts.com, I get a small percentage of what you spend (at no extra cost to you).

If you thought this was completely brilliant and amazing, please consider buying me a ko-fi!

Cheers! xxx

Free Crochet Pattern. Ribbed Mohair Hat

I don’t need a new crochet hat, I have plenty of hats, but when is that ever an excuse? As a crocheter compelled to make stuff, hats are pretty good palette cleansers in between more complex projects. They are also great stash busters and I am definitely a fan of a decent stashbuster.

The idea behind this crochet hat is to use my pretty leftovers of mohair yarn from all the fluffy adventures I’ve been on over the last couple of years.

Before you read on for the pattern and its details, I have also made a YouTube video tutorial, which you can find HERE. During the editing process I noticed that I tell everyone I used a 4.5mm hook to make the hat, I didn’t. I used a 5mm. Please ignore “Tutorial Zeens”, she doesn’t know what she’s talking about. Well, mostly she does, everything else is good information….

On a family Sunday walk, wearing my stashbusting crochet hat.

Notes on Making your Crochet Hat

making a rib stitch crochet hat

A Crochet Rib Stitch

I wanted to keep things simple but also use the best kind of crochet rib stitch. There are lots of hats crocheted in this kind of method but often I see a half treble (US half dc) worked in the back loop only. I love a htr back loop only but not for a rib. There are better options that are tidier and more effective, like the one I’ve used in this pattern.

For this hat I opted for a yarn over slip stitch (YO sl st) worked in the back loop only (BLO). It worked just as I wanted it to. It’s a stitch that would look great in fishermans’ rib style jumpers (must make one of these).

Please watch the video tutorial for a stitch demo. It’s one of those stitches that’s a little bit fiddly when you’re just learning but once it becomes a rhythm, it’s actually quite fun to do.

The stitch goes like this: Yarn over (YO), and insert hook into the stitch, yarn over and pull through all loops on hook.

Ribbed stitch crochet hat

The Yarn

The main yarn I used was a DK merino held with a laceweight kid silk mohair. If you have never used mohair yarn before but fancy giving it go, check out my tips of using mohair yarn.

The blips of contrast colours were a selection of all fluffy yarns in my stash leftover from previous projects. Mine range from laceweight to DK weight to chunky.

You can get fluffy yarn across all budgets and I threw everything into this hat regardless of weight or brand. The Christmas before last I made mohair and brushed alpaca scrunchies for my nieces. The leftovers are in this hat. The summer of that year I made a colourful cardigan out of MYPZ chunky mohair. (oh lordy, I called it DK in the video – another mistake!). I also had fluff from other projects too. Let’s chuck it all at the hat!

The colour changes are pretty lazy. Working with two strands all the time, whenever I wanted to introduce a new shade, I popped the one I didn’t want out of the way and laid a new strand with the one still in use. Then I swapped back when the contrast colour ran out, or whenever it felt right. When not in use, I floated most of the main colour across the wrong side of the work. Sometimes, if they were overly long, I’d snip them and rejoin later.

Crocheting a Hat to Fit

I worked 70 rows of 40 stitches. The piece of fabric measures 23 (the hat’s depth) x 47cm (the hat’s length). My head measures 56cm, which is quite a few centimeters more than the length of the hat. This is because you need negative ease in a hat so it stretches to fit. Standard negative ease is about 5-6cm for a hat. Mine is a little more than that as it will stretch out further upon wearing. Essentially my own head is “blocking” it out as I wear it.

Blocking? Simply put, blocking means to wash or steam your woolly items and then (gently or aggressively) stretch out the item as it dries. It will then be fixed in its new state. I have no intention of properly blocking the hat. I have no intention of washing the hat at all (unless it falls into a muddy puddle or something) so I don’t think blocking is too urgent. It depends on your own personal preference for a project like this. Yes, a gentle steam block will even out stitches. And yes, it will create additional length and width by being stretched out. It depends on how particular you are as to whether you want to do it properly. This is a quick win crochet hat so I’ve just eyeballed it.

By all means, if you’re a harcore perfectionist, make up a swatch, wash it and leave to dry. You can then measure how many rows and stitches there are over 10cm (4 inches). From these measurements you can work out Gauge.

Here’s my unblocked gauge: 18 sts and 15 rows per 10cm. It varies a little bit here and there when the different weights of yarn are applied.

Crochet Ribbed Mohair Hat Pattern

Things You Need

  • 100g of DK yarn, I used West Yorkshire Spinners “Bo Peep”, which comes in 50g balls.
  • 25g kid silk mohair, laceweight. I used Drops.
  • Lots of different contrasting colours of various mohair, brushed alpaca, or similar.
  • You will need extra of everything for the pompom. If you’re shopping for the whole shebang, add 3x 50g dk and 2x 25g laceweight to your shopping basket for the main body of the hat.
  • 5mm hook. This is me going up a hook size than I’d normally use. I found it too fiddly to get the hook into the Back Loop Only (BLO) with a smaller hook.
Crochet hat in a gorse bush.

Hat Pattern

Chain 41
Row 1: In the second chain from hook YO sl st, YO sl st to end, turn. [40 sts]
Row 2 – Row 70 (or however many rows you need for a bigger/smaller noggin): 1ch, YO sl st BLO to end, turn. [40 sts]

This finished piece measures approx 23 x 47cm.

When changing colours, ensure ends are all on the “wrong side”. I didn’t worry about sewing them in. I am going to let their flyaway fibre structure do the work for me. Mohair never wants to let go so I’m pretty sure none of these contrast colours will work themselves loose. If in doubt, feel free to tie ends together before tidying up the ends with a pair of scissors.

When you fasten off, leave a long tail for sewing. Sew up the side using a whip stitch, do this wrong side out. I have demonstrated a way of doing this in the tutorial that ensures it’s pretty much invisible. Using the same length of yarn, run the needle along the top circumference of the hat, going in and out of the rows. Gently but firmly pull to close. Then, secure everything in place by working the needle around the gathers, back and forth, again and again to lock it all in place. Tie off but don’t snip just yet.

Crochet hat

Tiddly Om Pom Pom

I am not going to write a step by step process for pompom making. I am not good enough! But you will hear my delight in the video tutorial when I made the one for the hat. I have every confidence that you will be better than me at making a pompom. But at least I didn’t break the yarn this time. Be careful when tying off the pompom as I have a tendency to break the yarn by pulling too hard!

When attaching your big fluffy sphere to the hat, be firm with the tying so the pompom won’t loosely flap about atop your head. Once secure, I also tied all loose ends together and then snipped to trim rather than sew them in. No one has time for that, especially you aren’t going to see them.

If you don’t want to make a fool of yourself like I did you can always buy a ready made one?

Mohair hat

Celebrating the Granny Stitch with 18 Crochet Patterns

For the Love of Granny

When one thinks of crochet, it is almost guaranteed that most of us will conjure up a picture of a colourful square with rounds of uniform granny clusters. It is THE quintessential stitch that represents crochet whether we like it or not. The granny square has been around since the Victorians, growing in popularity during the 1960’s and 70’s. Then it seemed to disappear for a while, along with crochet in general. But for the last few years it has exploded in popularity again, hasn’t it? Crochet, and the granny stitch, is everywhere!

Crochet is definitely back in fashion and the symbol upon its banners is a granny square! We are in a granny renaissance! And luckily this means a whole new generation of fans who are learning to love, not only the granny, but all things crochet.

What I want to do here is celebrate the humble granny (everyone always calls it humble, don’t they?!). I thought it would be a good idea to get a selection of granny stitch patterns where there’s something for everyone to enjoy. Read on…

Why Granny is the Greatest

Honestly, I could be here forever and a day, sing songing about all the fab reasons about why the granny stitch is just soooo good but let’s stick to a small handful…

Firstly, rose-tinted nostalgia! For me, and for others I know, crochet harks back to a time when our mothers and grandmothers were, with busy hands, stitching away at yarn crafts (and yes, fathers and grandfathers too!). For decades my Nanna would stash bust her way through yarn scraps with a make do and mend mentality. She was always making giant granny square blankets from leftover yarn. Yarn that was left over from all the knitted jumpers she made. It’s satisfying to know that we’re carrying on a version of those traditions, and being economical too.

Secondly, it’s how we learn to crochet isn’t it? Not that I think it’s the best way to learn, it really isn’t (that would be the methodical process of learning rows and rows of single/double crochet before graduating to row and rows of other stitches. But that’s not as exciting though, hey?!). Nevertheless, a granny square seems to be the most taught pattern for beginners and that’s because it has an easy pattern repeat and is quick to work up. Instant gratification!

It doesn’t need to be written down, it just gets handed down from generation to generation like an old fairy tale. Sometimes there are slight differences but ultimately it’s a square of squishy goodness.

A classic Granny Square blanket, made for my sister.

Other Reasons to Celebrate the Granny Stitch

One of the other reasons I love this classic stitch so much is because it is the ultimate in comfort crochet. Whenever life gets too much, or I’m working on a pattern that’s a bit complicated, I turn to Granny for a bit of soothing stitchery. It works wonders! Almost like a hug from your real granny! It’s the ultimate in mindfulness.

You can literally do it with your eyes closed! With a little bit of practice, the granny is the best stitch for resting your eyes and crocheting at the same time. Those gaps between each cluster are easily found by touch alone.

Like Nanna knew decades ago, granny stitch projects are fantastic for busting that stash. Granny squares are perfect for using small scraps, you only need small amounts to create a pretty mishmash of colourful squares.

Granny is the gateway drug to “proper” crochet. I say this knowing that some of you might tell me off and argue that granny is real crochet! Yes, of course it is, I don’t dispute that (this whole post is a big love letter to Granny so it would be remiss of me to throw it under the bus) but there is also soooo much more to crochet than this stitch alone. It’s really exciting to see new and different designs coming out that really push the boundaries of what crochet can do. Once you’ve conquered how to make a granny, why not try something new?!

The Ultimate Versatile Crochet Stitch

You can pretty much grannify anything you want. This is because it’s such a simple, no frills crochet stitch. If you’re not ready to move on to pastures new just yet then there is plenty of fun things that Granny has to offer. Oh, the limitless potential!!

To be honest, I don’t think the granny will ever truly go out of style as there are so many options for patterns. Even when the time comes when it’s not featuring in Vogue or whatever, there will still be crocheters building little piles of squares, or working on their stripes in all kinds of ingenious ways.

One day it is my goal to decorate my old Nikes in bright squares. I’ve seen it, it has been done, and it looks amazing!

Collection of Granny Patterns

So after all the waffle, extolling the virtues of my fave stitch of all time (probably…), here is a selection of granny patterns to check out. Not gonna lie, I have more than enough to ensure that this post could be all about me me me, but I have also added awesome patterns that are from other designers. I’ve made them and can attest to their brilliance.

The majority of patterns below are available as written instructions. I have also created video tutorials for a few of them too. There are lot of shawls, scarves & cowls, bags aplenty, a blanket and garments here and there too. Phew!!

Wayward Sisters – Granny Stripe Shawl

Wayward Sisters, a granny stripe crochet shawl.

I’m starting with my latest granny pattern. This is the Wayward Sisters and it’s a free crochet pattern. You can find it here. It’s a straightforward pattern using granny stripes and is super fast to work up. I pretty much made this in one weekend!

Granny Market Bag

A granny stitch market bag.
Photo courtesy of Inside Crochet magazine

Another new pattern from me! I love love love how this awesome crochet market bag turned out. It’s stripey clusters worked diagonally from corner to corner which is then magically transformed into a super modern shopper. You can find it on Etsy or Ravelry.

Miu Miu Inspired Granny Stripe Scarf

This is from last year when Miu Miu had granny stripe scarves on sale for a LOT of money. Make one for free here on my lovely crochet blog!

See My Vest – Crochet Tank Top

See My Vest, a Crochet Tank Top using the granny stitch.

See My Vest, See My Vest, not made from gorilla chest! (sorry, it’s a rubbish Simpsons reference, I apologise). I came up with this design as homework for upping my grading game. It was a good lesson as this colourful crochet tank top comes in 9 different sizes. You can get a copy of the pattern from Ravelry, Etsy, Lovecrafts or Ribblr (that’s a lot of pattern platforms!)

Chevron Cowl Pattern

This chevron cowl is just so quick to work up! Find the pattern and tutorial here so you can make one, two, three or more! It’s a snug fitting cowl but you can keep on going to make a version that’s more like an infinity scarf.

Granny Christmas Hat

As hats go, I have only designed a Christmas hat with clusters of extra chunky yarn. Perhaps I should consider more hats (even balaclavas) to add to my catalogue of grannies…

Granny Stitch Cowl

Another crochet cowl but this one is super contemporary and cool. It brings the granny stitch to the modern day and looks totally effortless. Find the pattern on Etsy and Ravelry.

Gudrun – A Modern Shawl Design

Gudrun, a contemporary crochet shawl suing the granny stitch.

This is the Gudrun pattern and is my interpretation of what “grown up” granny looks like!

Fun fact, did you know that this shawl is named after Gudrun Ure, the actress who played Super Gran in the eighties kid’s TV show! Thanks to Alyson Chu of Moorit magazine for coming up with that gem.

A Bag for more Crochet Projects!

https://zeensandroger.com/2019/07/11/granny-square-bag-free-crochet-pattern-video-tutorial/

Join As You Go squares are worked in a rectangle, folded in half and joined at the sides. The bag is lined so nothing can escape through granny’s holes! Find the free pattern and tutorial here.

Another Crochet Market Bag Pattern!

A modern granny stripe crochet bag

Oh my goodness I have made a lot of these cotton market bags! A lot of market bags in general to be fair! I use every single one and they make fabulous crochet gifts too. This one has lots of drape. If that’s not your thing, go down a hook size or two.

Hotchpotch Granny Purse

You can make this Hotchpotch purse in so many different sizes. Add a zip, add a magnetic clasp, add handles. Do whatever you like! Worked from the bottom up, in the round, it’s a very easy pattern to adapt. The video tutorial shows you how to line it too.

Granny Edged Rainbow

A Rainbow edged granny square blanket

This one is going back a bit and is more of a recipe rather than a standard pattern. I mean, do you need a pattern for a granny square? OK, sorry, you might be looking for one here. Fear not, you’re in luck, this one has a video tutorial! Find the blanket recipe here.

Simple Granny Stitch Shawl

A very early pattern from me that is a step by step photo tutorial of this very easy crochet shawl, which is super useful for beginner crocheters.

Asymmetric Cowl Pattern & Tutorial

I know, I know, another cowl. Better to have all the choices, no? This one is another speedy project as it’s nice chunky yarn on a big hook so it has a nice drape. Although it’s not very “me” I still have a soft spot for it even if the yarn I used left fibres EVERYWHERE! Find the pattern here.

Perpetual Dawn Granny. Retro Square Shawl

A granny square crochet shawl

This is a recent design I came up with for a crochet collection from The Fibre Co. You can find the pattern on their website and get the kit if you wish. I love the summery retro feel of this one. The lace weight yarn makes is floaty light and ever so silky.

Revival – A Granny Square Jumper

This fabulous crochet sweater is by crochet designer, Heather of HG Designs. The granny stitch is her modus operandi and definitely someone to visit if you are a major fan of all things granny. Revival is a jumper that always gets checked out when I wear it.

Just Feel Festive Shawl

I wear this colourful stripey shawl scarf allllll the time. I wear a lot of plain colours in real life and if I feel that something needs a splash of colour, then this is the scarf I reach for. You can can this free crochet pattern from Caleisha Ryan. Mine is made from all my DK acrylic scraps, it is the perfect stash buster!! But do make a luxury version, like the original beauty, by using your pretty merino minis. They will look stunning!

Granny Go Round Jumper

Granny Go Round crochet jumper

Everyone has made a Granny Go Round, right? Oh my goodness, how many versions could you make? As with all Grannies, there are so many options for colour work. I went off piste in a couple of places when making this, including making the sleeves more balloony by adding some decreases near the cuff. I love this top down jumper. It’s fab!!

Which is Your Favourite?

I mean, if you got this far I know you must be a fan, right? What have I missed? Is there a Granny pattern you love that deserves a mention? Let me know!

Also note that I haven’t included all of my granny projects. make sure to look at my FREE CROCHET PATTERNS for more inspo, not just for the clever little clusters that we all love but for other patterns outside the Granny arena too.

Cheers! x

Wayward Sisters. An easy Crochet Shawl Pattern

Wayward Sisters, a Granny Stripe Crochet Shawl.

Wayward Sisters, a Crochet Shawl Pattern

We three met on the cusp of autumn. No thunder, lightning or rain, just glorious September sunshine and lots of crochet goss. It was the perfect weather for a weekend in the Cotswolds for three people obsessed with the same thing. Crochet!

The crochet shawl pattern I’m sharing here was borne from our weekend. Practically whipped up the whole thing whilst we were there, it’s that easy! Crocheting granny stripes is a doddle and just the thing needed to relax the brain.

The free pattern is below. Or, if you’d prefer, you can buy a downloadable PDF that isn’t littered with waffle and ads. The PDF can be found on Ravelry, Etsy and Lovecrafts.

Try my other Free Patterns here.

(Btw this post contains one affiliate link for the yarn if you want to directly check out the yarn I used)

One Wayward Sister

Wayward Sisters

We all convened on a Friday afternoon when the sun was at its warmest. I can’t speak for the others but driving through picturesque English towns and country lanes to find an old barn to stay in felt proper exciting. The idea of a weekend away to literally focus on crochet, work on projects, and generally have a good time was much needed.

The last time I met up with Fay (of Fay H Designs and the Provenance Craft Co.) was in the early summer. She was vending at the John Arbon Textiles Mill Open Weekend and I was teaching a crochet class. Over the years, we’ve always managed to have quick chats at yarn festivals but I don’t think we’d ever sat down to have a proper chinwag. As we caught up she proposed the idea of a weekend away with crochet and friends. She and Michelle (of Dora Explored) had already been brewing plans for this so it was an easy Yes from me. Hovering over Google Maps, we poked a finger on the map, somewhere equidistant for all three of us, it landed on the Cotswolds. That’ll do nicely, thank you.

I met Michelle (of Dora Does and Dora Explored) for the first time three years ago. Rather fortuitously, she was in Devon for a family holiday and I recognised her IG pics so knew she was literally ten minutes from my house. We met up for tea and cake, with me being v late, dragging two kids who just wouldn’t get dressed that morning. We chatted for ages and I knew I’d found someone just as obsessed with crochet as me!

Yarn Everywhere

The funniest bit upon arriving was discovering that we had all brought a car full of yarn. Bags and bags, stacks of boxes, WIPs and secret projects! Yarn everywhere!

Despite bringing half my yarn stash I didn’t want to work on anything already begun. My new granny stripe crochet shawl has been on the agenda for the longest time but it has never been a priority. Ultimately it was the right balance of fun, relaxing and new. It fit in really well with the chilled atmosphere where there was zero pressure. Sometimes that’s just what everyone needs.

So the weekend went thusly: wake up, do a bit of crochet, wander round the garden picking pears, apples and sloes. Find some walnut trees (good for yarn dyeing), go back inside for a spot more crochet. Have a cup of tea. Go for a walk, go into town, have a pub lunch sat alongside the river Thames. Sniff out any yarn shops (hmm, half a one). Do a bit more crochet. Have some wine, do some crochet at a different tension…

I’ve shared a few photos here. There was a creepy old shed that I loved. It had great angles and light but my photography skills aren’t up for taking advantage of such a backdrop. The town of Lechlade was a great host. Amongst the interesting shops there was an antique place stuffed full of crazy taxidermy. What a fab weekend.

The Chosen WIP

After all that, you will want the pattern for a crochet shawl, right? I’m so happy to share this as I want you to enjoy the fun of relaxing crochet.

I made this crochet shawl because it was repetitive, methodical and I could trust it to do as it was told without me using too much brain power. In my holiday yarn stash were several (already wound) cakes of Cascade 220 Fingering yarn. Quite honestly, there were a few different projects I could have started with it . There’s still plenty left so, no doubt, you’ll see designs with related colour palettes at some point. But because a granny stripe crochet shawl had been on the To Do list for a while, it easily won as the thing to make.

Soothing Granny Stripes

Oky doky, before you begin, please know that this is a very easy single row pattern repeat. Once the first couple of starter rows are out the way, every row is the same. This is Easy Crochet at its finest! Adding stripes of colour in the mix stops too much monotony and really lifts the shawl. But ultimately, we’re just talking stripes of wonderful granny clusters.

When I started working on the shawl I felt almost embarrassed. I felt like I should be working on something impressive and fancy. I was with professionals who take this art very seriously!! But this was when it dawned on me why I like the granny stitch so much. It’s because it is the ultimate in comfort crochet. This shawl is the very definition of comfort crochet! It’s not out to impress, it only wants to make you feel good.

Do you often return to your favourite stitches? This could be why. Our favourite stitches make us feel safe and relaxed. That’s perfectly OK. I don’t always want or need crochet that soothes me but when I do, Hello Granny!

Colourful crochet shawl

Crochet Shawl Pattern

Here we go! Things you will need are: a 4mm hook, 3x50g skeins of Cascade 220 Fingering for the Main Colour, and 6 contrasting colours. I used approximately 20g of each.

Pattern Notes

  • The pattern is written in UK terms. The main stitch is a UK treble, which is a US double crochet. 
  • Contrast colours (CCs) are used three times each with 18 stripes of colour in total.
  • In established pattern, the CCs are placed every fourth row.
  • Rather than sewing in ends, I attached tassels to hide colour changes. Knot the loose ends together first before attaching tassels.
  • The PDF contains a chart with crochet symbols to follow.
  • The PDF also has a table charting where the colour chances are and where they are.
  • The PDF written pattern is available on Ravelry, Etsy, and Lovecrafts.

The Instructions

Work the first 4 rows in the MC, then change colour to a CC for the first time on the last st of Row 4. Then work a CC every 4th row. 

Chain 4 and join with a slip stitch, or make a magic circle.
Row 1: ch4 (counts as 1tr and 1ch here & throughout), 3tr, 1ch, 1tr, turn. [1 cluster of 3 tr + 1 st at either side]
Row 2: ch4, 3tr in first ch-sp, 1ch, (3tr, 1ch, 1tr) in last ch-sp, turn. [2 clusters + 1 st at either side]
Row 3: ch4, 3tr in first ch-sp, 1ch, 3tr in next ch-sp, 1ch, (3tr, 1ch, 1tr) in last ch-sp, turn. [3 clusters + 1 st at either side, increasing by 1 cluster each row]
Row 4: ch4, 3tr in first ch-sp, 1ch, *3tr in next ch-sp, 1ch; rep from * to last ch-sp, (3tr, 1ch, 1tr) in last ch-sp, turn. 
Rows 5 – 76: Rep Row 4.

Comforting Crochet Shawl

To Tassel or Not or Tassel?

Are you a fan of tassels? The jury is still out for me. The tassels are there because I couldn’t be bothered to sew in the ends. That’s all. As much as they add lots of mood lifting colour, I am tempted to undo them and add a less jazzy border. It’ll be simple to do, and if it happens and I shall come and report what I did.

And there you have it. Did you get beyond the tangenty gas-bagging?!

To give you a crochet shawl pattern I have to tell a story behind its construction. I enjoy telling the tale of how a design comes about. I just hope people enjoy reading them as much as I enjoy writing them!

Anyway, with that, the Wayward Sisters came together, worked some magic, and then bid each other farewell. Until next time…

Cheers. x

Fay’s fruits. Nuts, innit?!

The Life of (Crochet) Riley

The Riley Sweater

Say Hello to the Riley Jumper!

Or would you call it a sweater? I will probably use them interchangeably here but they are essentially the same thing. Here in the UK, Riley is a jumper. To my US chums and other worldly friends, I think it’d most likely be a sweater. Whatever you call it this is a crochet pullover (?!) that is sure to keep you warm as the season changes and the weather gets a bit more chill.

Get Your Hands on the Crochet Pattern

As usual, rather than make you jump through hoops, I’ll leave the info right up top. To get a copy of Riley (V2), pop over to Ravelry, Etsy or Lovecrafts, whichever is your fave place to shop for crochet patterns. This jumper is size inclusive for nine different sizes.

The crochet pattern is written and available in both US & UK terms. I don’t always get round to doing this (soz See My Vest) but given that this one uses a few different stitches (in a fun way) I thought it would be helpful for all makers.

Riley crochet sweater by Zeens and Roger
Riley, a Crochet jumper by Zeens and Roger

The Life Story of Crochet Riley

The incarnation I’m giving most of the attention to here is not the first Riley jumper. No it is not. Last year I was asked by Inside Crochet magazine if I was interested in designing a cosy sweater of simple construction with some lovely wintery colours in it. I think they asked me because they know I love chucking loads of random colours together to create peculiar rainbow palettes.

The first Riley

Riley was, at first, a frosty mornings sort of jumper. Something warm and cosy for January temps when the skies threaten, or promise, snow (yay, snow!). The colours didn’t go as far as bleak mid winter vibes but they weren’t totally into fiery fiestas either. I finished Riley V1 last October and in January of this year it was the front cover star of Inside Crochet magazine! It looked fab, it really did! It still looks fab. I will no doubt wear it again and again, much like I did last winter. But there were things I wanted to change…

Riley on the front cover of Inside Crochet!
Riley, a fun crochet jumper!

Adjusting a Handmade Garment

Here’s the thing, designers are never satisfied. There is never a moment when a design is as perfect as it could be. Designers are always striving to make one last tweak, one extra adjustment. Unfortunately there comes a time when you must accept that it is time to step back and say a project is finished. I had to do that with the first Riley but when August came to an end and I stumbled upon my leftover stash of chunky yarn, I had this idea that I needed to make an autumn version. So I did. But with tweaks.

The main differences between 1 & 2 are the colours, the stripe depth, and the sleeves.

If there are any changes you feel you want to make then go for it! Crochet, and making your own clothes in general should always have an element of freedom to change if that’s what you want. We all have different bodies and making adaptations to suit personal preference is all part of the joy of handmade.

Main Design Tweaks

Colours? So yes, mostly I had yarn in stash leftover from jumper number one but I swapped out three or four colours to liven up the palette. Simple. Job done. Obviously makers can choose their own shades should they wish, it’s great that handmade has this flexibilty. Go for whatever colours you want!

The body count (stitch count of the body that is) remains the same. It’s the stripes I changed. I wanted to know what more stripes looked like. Stripes that weren’t so deep so that I could squeeze more in and therefore get more of a colour party happening.

The depth of stripes is also up for mixing and matching but obviously has an impact on the amount of yarn required for each. More stripes means more texture, which is a win in my book. This is achieved by the front post stitches. Everytime a colour changes occurs, they are introduced and it creates superb little ridges and pops of colour. Another win, don’t you think?!

In the pattern I have only given the yardage/metereage for what I have done. I’d be here for weeks if I worked out every possibilty, Not prepared to do that I’m afraid. But the option for playing around is there if you want.

The last, and biggest, difference between versions is the sleeves. Upon giving Riley V1 its first proper bath, it stretched a little bit further beyond my initial blocking. Not horrendously, just enough that the sleeves (always the overstretch culprits!) covered hands almost to the finger tips. This didn’t surprise me in the slightest as it was intended to be a slouchy fit and as per the brief, long, digit tickling sleeves were part of the remit. Nevertheless, day to day wear? Bit annoying if sleeves are in your breakfast so I knocked off a few rows to accommodate.

Colourful crochet sweater

More on the Sleeves

I’ve also changed the stitch count on the sleeves a little bit. Not so much that it’s obvious, it’s important to keep the oversized nature of them. But here was the problem: I struggled to squeeze my arms into my favourite winter coat. There was way too much bulk in the upper arm.

My advice would be to read the measurements of the sleeves in the crochet pattern to determine what you want to go for. You don’t necessarily have to rely of the size you’re making if you want a snugger fit. However, do note that the upper arm depth is already a couple of centimetres smaller than the original.

I’m hoping Riley V2 fits inside my fave coat now. At the beginning of the year, when I forced my arms inside that coat, I had the bulky appearance of a muscle man. We’d been watching Henry Cavill in the Witcher and I looked just like him, I swear! So yeah, sleeves are improved.

Chunky, Woolly Yarn

For both jumpers I used Re:Treat by West Yorkshire Spinners. (This is an affiliate link which means rather than Lovecrafts getting all your money a percentage of it comes to me instead with no extra cost to you).

The colours are gorgeous and very modern. I really liked using a roving yarn in the design, just the glide through the fingers was enough for me to be sold but once worked into a fabric it is also incredibly warm. I would definitely recommend giving this yarn a go, but if you wanted to use something else, try visiting Yarn Sub. Here’s a direct link to the Re:treat in case you fancied checking out some alternatives.

The Photoshoot

Photo shoots for my crochet designs are sometimes great fun, sometimes not. As has happened before, I rather bossily turned a lovely family weekend walk into a crochet fashion shoot (see the Dreckly mittens blog post – one of my fave posts ever by the way. I was in a very silly mood that day!) I did it for the January Hues hats too, and others, so it is a bit of a habit. It’s not always fun for the kids as they get fed up with their mother stopping countless times for good light and taking “just one more” picture in case all the others are a disaster. The husband also has to take a big sigh every time I expect him to read my mind about how the composition should be set up. He’s often the designated pusher of (camera) buttons.

I did think about sharing some additional pics of where we were but this would be a very long blog post if I did that. Maybe there needs to be a separate one for those? It is a very pretty part of Devon, all we need to do is walk a little bit out of town and there’s countryside. A story for another day I think.

Anyway, I very nearly forgot to say! Riley has nothing to do with the ubiquitous “Life of” I’m afraid. Riley is named after British artist, Bridget Riley. It’s all the stripes you see. Google her name and you’ll see what I mean. She’s cool.

PS If you have scrolled to the bottom looking for the pattern, the links to my shops are at the top! But since you’re here: Ravelry, Etsy, Lovecrafts is where you will find my crochet designs. And don’t forget to share your makes on Instagram!

Zeens and Roger wearing a Crochet jumper
Living the Life of Riley.
Use up leftovers on the Hepworth Mittens

Crochet Mittens

And finally, as a PPS, you can also get the crochet pattern for the Hepworth mittens (named after another female artist, Barbara Hepworth). You can find them on Ravelry here.

PPPS. Cheers! xx

Z&R Crochet Podcast 101. The Curse of the Creative

Fancy Watching a Crochet Podcast?

It has been a while but here is Episode 101, the latest crochet podcast which, you can watch over on YouTube now! I hope it’s worth the wait. It’s chock full of lots of different yarny projects so I think (I hope), you will enjoy spending some time with me.

To watch the episode, you can find it by clicking on the picture above, or popping across my YouTube channel HERE.

The list below is representative of the topics discussed in this latest crafty chat but if there is anything missing please do give me a shout…

Perpetual Dawn for The Fibre Company

Notes & Links to the Crochet Good Stuff:

A couple of blog posts that might interest you are: Working with Mohair Yarn which has a few tips on working with the fluffy stuff. And another, which is an easy guide to How to get Gauge for crochet clothes.

The cotton bucket hat is my latest free pattern. You can find it on the blog right HERE. There’s lots more detail on that blog post about the yarn I used and the pattern itself.

More is to follow about the Farmer’s Field cowl so no actual links yet. I’m feeling self conscious about it. Is it good enough? I like it, I am pleased with the eyelet details. Having a few wholes makes the yarn go further and is a bit different from my usual Corner to Corner crochet patterns.

I did mention about the John Arbon Knit By Numbers yarn though, that is now a C2C cowl but was once an early version of Harvest Moon. Check out crochet podcast episode 36 with that old edging!

The Granny Square Market features in issue 149 of Inside Crochet magazine. Since recording I have already started working on a V stitch version. The release date for it on my own online sales platforms will be at the end of October.

Have you seen Perpetual Dawn yet? It’s a granny square shawl designed by yours truly for The Fibre Company’s “By Hook” Collection. There’s nothing quite like a giant granny project is there?! And I like how this one looks very grown up. I don’t know if you remember but I used their yarn before in the Foragers’ Shawl.

Happy Crocheting. Cheers! X

Granny Market Bag for Inside Crochet magazine
An easy Crochet cotton bucket hat
A cardigan with no name. Yet
A new crochet design in progress
Farmer’s Field
Summer ripe figs.
Destined to be crochet socks
Cotton Crochet Bucket Hat
Blocking swatches

Cotton Crochet Bucket Hat

Crochet Bucket hat

A few weeks ago I shared this cotton bucket hat on Instagram and I’m really pleased to say that it has been quite popular. Well, I have seen lots of fab crafters make their own versions of what is a very easy hat to crochet, which must mean it’s something people want to make, right? Anyway I’ve made a second hat because I’ve already lost the first one… oops! As I was hooking it up I decided it deserved a place here on the blog, a blog that I’ve neglected since when? April? (my longest break ever!!)

Obvs bucket hats are every where at the moment, I’m sure I don’t need to tell you that! It’s been at least a couple of years since they started popping up as a trend. I know because I made a straw hat version last year. This new pattern uses the US dc (UK treble) rather than a half double (UK htr) and the brim is different too. Essentially they are both bucket hats and they’re both free patterns right here for you to use! Also, let me point out that the other one even has a video tutorial!

changing colour every 2 rows for this crochet hat.

Crochet Pattern Preamble

The pattern then…here we go. I’m gonna use US terms here because I originally wrote the pattern to put in an Instagram post. A lot of followers over on my IG are from the US or are familiar with US terms so I thought that might be a good idea. Please know that all this dc stuff means a UK treble stitch. And because I boshed it out for Insta it also means that it is a pattern with basic detail. That just means I assume you already know the crochet basics, sound okay?

Zeens and Roger Crochet Bucket Hat
I changed colour every row for this one

Notes for before you start Crocheting your Hat

You will need to grab yourself a 4mm crochet hook and dk cotton yarn to make your bucket hat. I used King Cole Cottonsoft. If I’m using cotton in a project this is the yarn I go to first as I find it nice to work with and it has a good range of shades (plus, I’ve got loads of it as stash!). I’m not a major fan of cotton but it definitely has a place, which is usually crochet bags and summer items.

Chose whatever colours you like and change them as often as you want, tis up to you. You know there are no rules here for that sort of thing. For my first hat there is a colour change at every stripe. For the second hat I changed colour every other row. I think the two stripe is slightly more my cup of tea but that’s only if I’m being picky.

The hat fits an average adult human head. I believe my head is probs an average human size. To adapt the pattern to fit a different sized bonce, try going up or down a hook size, or add/take away an increase round. Remember to adjust the brim increases if you’re going to do this though. You can see that the increases follow a certain formula in that the number of stitches in between increases also grow regularly. Once you get to the brim, it’s a case of continuing on with that formula.

I mention crab stitch as an instruction in the last round. This is a reverse US single crochet. You literally work an sc (UK dc) the opposite way to normal. It creates a sort of spirally effect, which is great for edging lots of different crochet projects (I use it quite often!).

Crochet Bucket Hat

Cotton Bucket Hat. Crochet Pattern

Note that “Inc” means “increase” ie, to make 2 stitches in the same place.
Also note that you join each round by slip stitching to the first st of that round (I just don’t want to write that instruction multiple times!🤣).

Make a magic circle, or chain 4 and join ends with a slip stitch to make a circle, which you work into.
Rnd 1: 3ch, 11dc in circle [12 sts]
Rnd 2: 3ch, 1dc in same space, increase around [24 sts]
Rnd 3: 3ch, 1dc in same space, 1dc, *Inc, 1dc; rep from * around. [36 sts]
Rnd 4: 3ch, 1dc in same space, 2dc, *Inc, 2dc; rep from * around. [48 sts]
Rnd 5: 3ch, 1dc in same space, 3dc, *Inc, 3dc; rep from * around. [60 sts]
Rnd 6: 3ch, 1dc in same space, 4dc, *Inc, 4dc; rep from * around. [72 sts]
Rnd 7: 3ch, 1dc in same space, 5dc, *Inc, 5dc; rep from around. [84 sts]
Rnds 8 – 15: 3ch, dc around.
Rnd 16: 3ch, 1dc in same space, 6dc, *Inc, 6dc; rep from * around. [96 sts]
Rnd 17: 3ch, 1dc in same space, 7dc, *Inc, 7dc; rep from * around. [108 sts]
Rnd 18: 3ch, 1dc in same space, 8dc, *Inc, 8dc; rep from * around. [120 sts]
Rnd 19: 3ch, 1dc in same space, 9dc, *Inc, 9dc; rep from * around. [132 sts]
Rnd 20: 1ch, crab stitch around (remember, it’s a reverse single crochet). Done!

Having a chat with Pod.

You’ve just crocheted a hat

And that’s how to crochet a cotton bucket hat, I hope you like it. As patterns go, it’s really quite simple. One of the most basic crochet stitches creates a super summery hat that can be worn all throughout the year. Then there’s the option of adding a crab stitch to finish, if you’re feeling fancy, but you don’t have to add this if you’d rather not. As usual, do what you want, that’s the great thing about making your own stuff! Make some tweaks and adapt it so that it suits what you want.

Cheers! x

PS. This post contains an affiliate link, meaning I get a teeny fraction of the price if you spend spondoolies at Lovecrafts via this link at no extra cost to you.