How to Make a Granny Square Bag. Free Crochet Pattern

Sudden Crochet Inspiration

I had no idea that I was going to make a bag last week, no idea at all! I was dashing off somewhere and felt I could do with taking a little crochet project with me. Hurriedly, random balls of yarn were grabbed and off out I went. Thus, a granny square bag was made! Yay!

I didn’t have enough yarn to make a blanket, which made me wonder what else I could turn the colourful granny squares into. I considered making a cushion, but what got me really excited was the idea of a crochet bag! It’s a tricky thing to take a picture of, the bright colours shout so loudly that they blew the pics out!

I used leftover Paintbox acrylic aran yarn and, just because I fancied it, joined as I went (I’m fairly sure I used the Attic 24 method).

Make a Crochet Granny Bag

To crochet your own granny square bag, you’ll need a few things. Here they are:

  • Colourful yarn (I used aran weight but any yarn is fine).
  • 4.5mm hook (if using a different weight make sure to use the right sized hook for the weight of yarn you use).
  • Bag handles (I recommend searching for “long bag handles” on Ebay or Etsy, that’s what I did!)
  • Lining fabric (something measuring a couple of inches bigger than your finished crochet piece)
  • Darning needle for when you’re sewing with yarn and pins, sewing needle and thread for when making up the lining.

The main body of the bag is a bog standard gang of grannies; super quick and easy to do! Rounds of three, joined together in 8 rows of 5 (you’ll either need more rows or more rounds for each square if you’re using DK yarn, check out my tutorial for a double knit version here).

My piece measured 15.5 x 27 inches (40 x 68cm).

How to Place Colours in Crochet

Every now and again it is worth checking to see that the spread of colour is even. I eyeball the colour layout for the granny squares, taking into consideration how colours look when they sit next to each other. I also make sure to know what I’ve got left in stash so that I don’t accidentally run out of a shade half way through. If you take a look at the picture above, you can see that the colours are evenly distriubted.

Adding Handles to a Crochet Bag

Once the main body of the crochet bag is complete,  the handle sections need to be shaped. It’s not as tricky as it looks and luckily, accuracy is not paramount. I don’t mind a project that needs a bit of bodging and crochet is usually very forgiving when it comes to bodging! Not that you need to bodge it, I’m just saying!!

UK terms are used (a treble is a US dc)

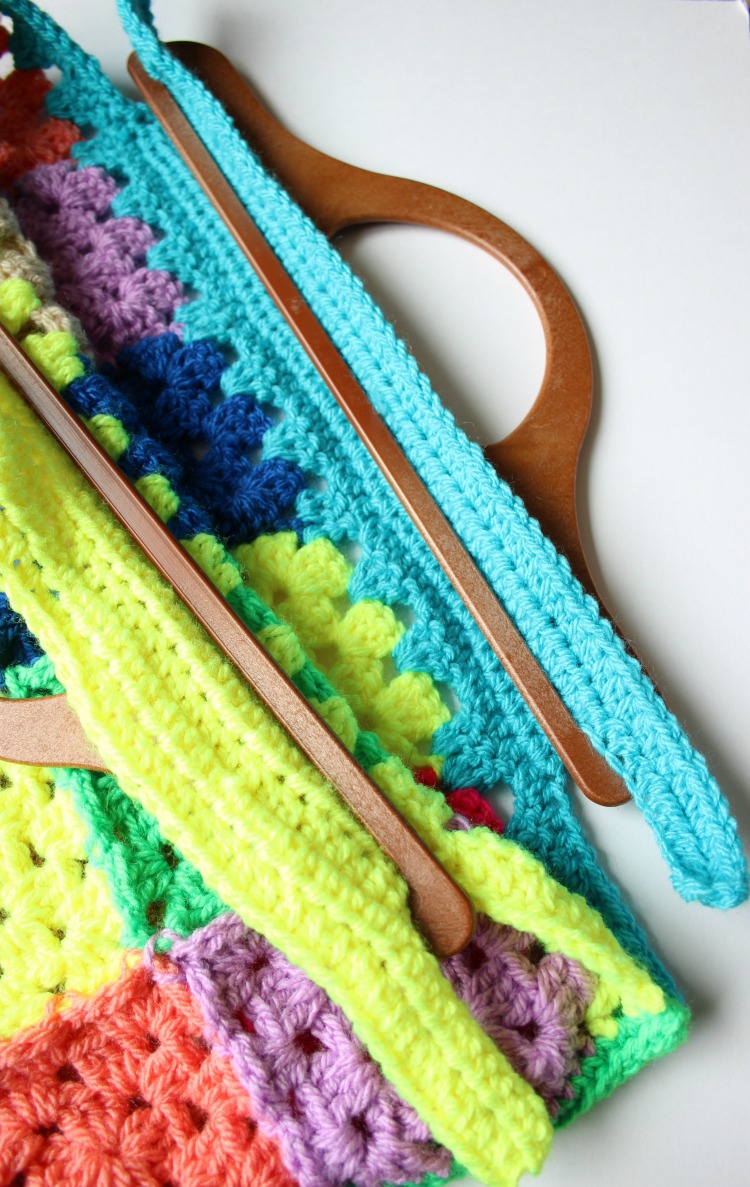
  1. At one end of the main body, (right side facing) work a strip of granny clusters starting with a ch3 and 1tr in the first st and ending with 2tr on the last stitch of the row. Straddle the square joins with (1tr, tr2tgr, 1tr).  You can kind of see what I’ve done on the picture above but I also show you how to add this edge across granny squares (about 2:40 into the vid)
  2. Turn the work. Ch2,  1htr in each stitch along to the end. Turn.
  3. Ch1, slip stitch along approximately 10 stitches (you want the narrow section to be the same width as the handle slot). Ch2, 1htr in each stitch along, missing the last (approx) 10sts. Turn.
  4. Ch2, 1htr in each stitch of last row. To widen the work again, ch13, Turn.
  5. 1htr in 3rd ch from hk. 1htr in each st along to the end. Continue by adding 10 more stitches using a chainless foundation half double stitch. This is actually lovely to do, I promise. I have a video that shows you how, it’s here:  The Foundationless Start. Skip the first bit of the video (that explains the same technique for a UK dc). Turn.
  6. Ch2, htr all the way along. Turn.
  7. Repeat row 6. Fasten off.
  8. Repeat 1-7 on the other end of the bag.

Next, with right side facing, evenly stitch dc’s (sc’s) all the way down the edge of both lengths. Don’t fasten off yet…

Fold the granny square bag in half and using the yarn still on the hook, slip stitch the sides together. Repeat on the other side.

Tuck the handle bits through the handle holes/slots, then fold down to the inside and pin, ready for sewing closed.

The stitches don’t have to be super neat. If you use matching yarn, you won’t see if you’re making a dog’s dinner of it! Try not to come through to the right side though, or if you do, make the stitches small so they’re not staring at you. Don’t forget the top bits at the ends.

Add Lining to Your Crochet Bag

Next, you need to add the lining. It’s not 100% necessary but I think it looks better and you won’t have your stuff escaping through granny holes!

Fold a length of fabric in half, right sides together. Place the granny square bag on top and mark/draw where you need to sew. Also mark where you want the fold of your top hem to go. Sew down both sides to make the bag cavity. Next, iron the seams nice and flat, at the same time fold down the top hem and press. I went back to the sewing machine and top stitched the hem.

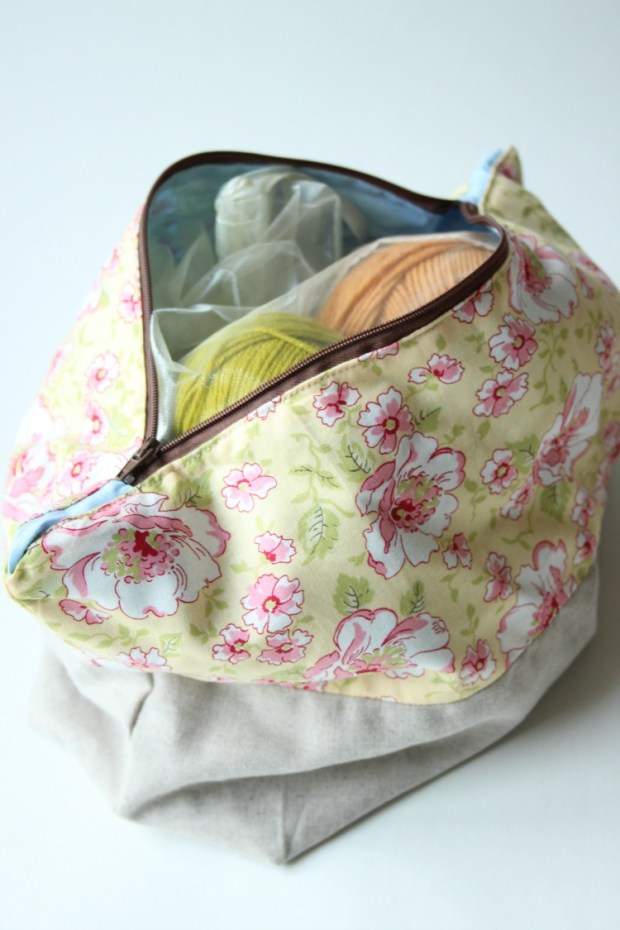
Tuck the lining into you bag, pin it in place and hand sew the top of the lining to the top of the crochet! And there you have it, a crochet bag of your own!

Oh goodness, I think I need a course in how to photograph bright colours!!

I would absolutely love to hear from you if you make one of my designs. If you do, please give me a shout. I’d love it if you said Hi! Don’t forget that I’m on Ravelry, so your makes can be added there. Oh, and I almost forgot Instagram! #zeensandroger

Thank you. X

Subscribe to Blog via Email

Enter your email address to subscribe to this blog and receive notifications of new posts by email.

A Bunch of Handmade Gifts.

a-pile-of-christmas-makesMy blogging will is not here today. I’m not really here. I’d rather be doing my crochet. I’m looking over to the other side of the room to where my current WIPS are. Getting the balance between making stuff and blogging about it can be tricky! The problem today is that I’ve seen all this stuff, like, ages ago! I love writing a craft blog, I really do but I also must find the time to do the thing I write about. It’d be a bit futile if I didn’t do any craft wouldn’t it?!

little-fabric-basket handmade-christmas-presentI probably made this little fabric basket in October. I use a great tutorial for making these (it comes in two different sizes). Go Here for the instructions.

handmade-bag-with-bamboo-handl bag-with-bamboo-handlesI made up the pattern for this bag. I must make another and, when I do I think I’ll do a tutorial. This will hopefully happen at some point this year, it’s on a list of things to do but so are lots of other things! I also want to do a crochet version with bamboo handles as well!

could-do-betterThis project bag annoyed me. I forgot to add interfacing and it’s all floppy. The recipient didn’t mind and I guess that’s what counts.

t-shirt-yarn-crochet-bowlI made this a few months ago and it was meant to have another to nestle within. It hurt my hands so I didn’t make the other one. I think I chose a hook a size that was too small, which is what made it painful. The yarn itself is a t-shirt yarn from Tiger and felt beautifully silky. I don’t know who has t-shirts that silky, not anyone I’ve met.

rich-red-crochet-cowl gorgeous-red-crochet-cowlThis cowl was lovely to make. Very quick too. I used two balls of Drops Alaska and the pattern is from a new book by Nicki Trench. Crocheted Scarves and Cowls is the name and I bought it from The Works around November.

mustard-waffle-crochet-cushion-wiht-wooden-buttons crochet-waffle-stitch-mustard-cushion crochet-waffle-stitch-mustard-cushionAges ago I’d wanted to make a waffle stitch blanket. About a ball into the project I realised that the stitch was a massive, greedy yarn eater and it wouldn’t go as far as I’d invisaged. I frogged it and went in the cushion direction. It’s an 18″ cushion and I did 70 something stitches across with the old Stylecraft spesh. Love it. But it was a present so I gave it away.

kelpie-hat kelpie-hat-using-malabrigoThis is the Kelpie hat by The Crochet Project. Such a lovely yet simple stitch! I had to tinker with the number of stitches because I used a thicker yarn than recommended. This is a Malabrigo aran. I can’t remember the colour name and I don’t know where the label is!

red-cowl pretty-red-cowl

And this cowl is a free pattern from Here. I reduced the number of stitches so that it was a cowl and not an infinity scarf. Think this is Drops Nepal. Maybe three balls … 4? A couple of years ago I made the infinity version in a brown yarn and I wore it for about two years solid.

There really was so much more that I intended to make and time ran away from me. I also gifted lots of Christmas decorations too. Crochet baubles and lots of felt things were great for giving as little extras.

And now I’m going to dash back to my crochet pile and hide in there. It’s a lovely place to be.

Save

Save

A Crafty Catch Up: So Many WIPS!!

mustard!

September is here and I’m ready to begin my blogging ways again. You think you can carry on with it in the summer holidays, but you really can’t. I managed to squeeze in a few posts but production was down and time was limited. The exciting thing for me now, is that Youngest has started preschool properly. He’ll now be doing two and a half days a week. Think of all the stuff I can make!

a crochet cushion. waffle stitch.

At some point in the holidays I discovered the waffle stitch. I totally love it, it eats yarn but it’s such a lovely texture, it’s just wonderful. I was going to jump straight into another crochet blanket but then I thought a cushion might be the way to go. I even have some complementary fabric that can be the back. I’ve got some cusion pads, so there’s not much to stop me. I do have to frog all that I’ve done though :/  It’s working up blanket size at the moment, not cushion size. A small sacrifce, I reckon.

crochet ideas.

I’ve continued to tinker with my half circle project. I have re-started this project more times than is necessary. I’m getting miffed with it now. The latest issue was a lost crochet hook. My favourite crochet hook too. The only one of its size in my collection. Pssh, I was frustrated to the extreme. Worst of all, I lost it on holiday. I had to leave our holiday destination, knowing that I was leaving it behind. Except that I wasn’t. As soon as I ordered a new hook (and another back up set – just in case) I found it. I just don’t understand. I do not understand in the slightest. I took it, in a project bag, on holiday. I even worked on the crochet, in the car, on the way to our holiday destination. So how come I found it in another project bag, at home? How’s that?! Makes zero sense. Pfft.

geometric crochet design.

To forget my frustrations, I got drunk on geometrics. Do you like my new squares?! I love them! Thinking cushion again. I’ve gone from big blankets to baby blankets. From baby blankets to cushions. I guess I can work on more things that way. I’ll get each project done in no time and then I can move swiftly onto the next thing. Like it.

simple crochet squares.

These little crochet squares can be twiddled into different formations too. I haven’t made my mind up about the directions they’ll eventually go in, but I’m getting there. It’s lots of fun. It has also lead to other ideas, one of which I will write a separate post about soon because there will be a new pattern! Woot!

colour pop swap.

For Halloween I’m taking part in a Colour Pop Craft Swap!! I haven’t actually started this yet but I’m already getting urges to pick up the hook. It’s linked to Instagram and fellow blogger Set Free My Gypsy Soul. I’m very much looking forward to it, I’ve got the perfect thing in mind! I’m to send my finished present to an assigned IG friend and I’ll get one from someone else. It’s like Christmas but better; Halloween is my favourite!

puff stitch hat

I made this puff stitch hat on holiday (when I couldn’t do the other thing). This derrived from a yarn buying fail. I was in a hurry one day and grabbed an aran ball of Stylecraft Special instead of the dk. With only one ball I thought I’d give a hat a go. Whilst it fits, it doesn’t fit how I want it. Not slouchy, is the thing. At least I know for next time.

home made dolly fail.

Dolly fail. You think you can just cut out some bits of fabric and they’ll magically stitch up into the perfect doll. This is based on a pattern I drafted last year. It was dodgy back then but I still made a doll to give as a Christmas present. This time, it just isn’t up to scratch. I want it to be really good. I’m struggling with the neck/head. And symmetry. I guess that one is quite important, no one wants a wonky dolly. Still, considering I haven’t followed a professional pattern, it’s not too bad. A few more tweaks and it might be OK.

doll's coat.

I probably should have focussed on the doll before getting excited about making her clothes. This was going to be a very glamorous reversible coat.

making a doll's dress.

I added facings on a dress but didn’t get any further. Both the coat and dress would fit quite well but it’s still probably just rolling a turd in glitter.

my crafty holiday buys

These are my holiday purchases! We went to Wales. We stayed in the Cardigan Bay area, which is beautiful. I might write a post about that too… We took a (half) day trip to Newcastle Emlynn, which is a nice little town (no shoe shop, which I needed – my flip flop broke). There were lots of charity shops and a couple of antiques places and three fabric shops!  I fell in love with one of the fabric shops. I think it was called The Cross Patch. Seriously, it was room upon room of fabric and all things sewing. So much beautiful cotton fabric, it was so hard to leave so much behind. I also bought a new purse from the National Wool Museum. I love my new purse! Oh and I haven’t taken a picture of the Sylvac plant pot holder I got for 3 quid from one of the charity shops. Bargain!

tray of sewing.

And finally, I got the sewing machine out again today to start on a couple of other things. One is linked to the geometric squares and the other, is a thing just because I want it.

Anyway, I feel like I’ve gone on quite enough for today, so I’m off. I have some photos to edit for a tutorial and Etsy. I’ll be sharing both here in the next week or two. I’m so excited by the extra time I’ve got! I’m trying hard not to squee about it because there’s also the expectation that things like more laundry and toilet cleaning will get done too. Haha!


Etsy Shop is Open!!

felt owl brooch

Just a quick one to let you know that my Etsy shop now has stuff in it! Woohoo. It’s been a while.

All my blankets are up and I’ve added some other bits and bobs too. I’ve run out of time for today though so I will have to try and get some more up tomorrow. Now that I’ve done this, I’m starting to think maybe Folksy would have been a better option!? Oh, I don’t know. Let’s just see how this goes. I’m in absolutely no rush.

Zeens and Roger on Etsy.

If you ever need to find the link to my Etsy shop, it is also in my Contact page and my About page. Cheers.

Go and have a look!! Thanks. X

blue fish brooch. sequins

Red felt apple keyring. purple and blue butterfly keyring. A felt strawberry keyring. colour block blanket. Easy crochet. pastel ripple Gotta love a granny square. clashy granny square Bright crochet granny square blanket

A first attempt at Me Made May.

Having a go at Cherry Heart's Victoria Shawl.

At the beginning of the month I made a last minute pledge to join in with Me Made May. I love the idea; encouraging sewers, knitters, crocheters to make or refashion clothes to wear during the month of May. My pledge was to bring out all the handmade items hidden in my wardrobe and wear them. I also pledged to make a dress. The only problem is that the weather has been a bit iffy and even on nice days none of my makes have been suitable.

Random handmade clothes

All summery skirts, see? I wore the grey lycra maxi skirt but that was all. They’re all different: dirndle, wrap skirt, plain old elasticated waist jobs (with or without pockets!!). I guess I will wait until the sun really shines to prance about in them.

need to redo hem

Talking of that maxi skirt, the hem really needs sorting out. I’m glad I’ve been taking part in this challenge because it has brought to my attention that the hem needs taking up an inch. It’s a bit close to the edge. I think wide hems look better. It’s a long enough skirt that I can adjust it too. I know this because I keep tripping up in it.

skirt that needs unpicking

The other project that was brought to light was this pretty skirt. I remember getting ridculously frustrated with the machine tension. I didn’t know how to get it right. Then at the end of last summer, whilst “teaching” my friend how to sew, it twigged that I needed to adjust the bobbin tension under the plate. Honestly, I felt so dim-witted, I first started using this machine when I was 12 and I’m now in my thirties. The shame! Anyway, now that I know this, I want to unpick the skirt and sort out all the dodgy seams. This was supposed to have been done over the last few weeks… erm, maybe this weekend?!

Cherry Heart's Victoria Shawl.

This shawl, I am pleased with. I love it! I wore it to a wedding last weekend. I made it out of Drops Baby Merino. I think I’ll write about more about it next week. I took tonnes of pictures so I definitely have more to share. It’s a pattern by Cherry Heart called Victoria shawl.

Me!

And finally, this is the dress I made! I reckon the only reason I actually sat down and made it was because it was going to be my party frock for the wedding I went to. At the last minute I chickened out of wearing it, it didn’t feel smart enough. And it wasn’t warm enough! The pattern is from Simply Sewing magazine and it’s By Hand London‘s Charlie dress. I’m happy with how it turned out. I had to make adjustments for my weird body (I have a long body, with high waist and narrow back). I extended the bodice length and  widened the front side panels to accommodate the gargantuan bosom. (Thank you to 7 year old for taking pictures of me. I felt a bit daft doing this, I have to say).

close up of zip and wonky bits

Right at the end I spotted that the bands on the bodice don’t meet. I’m putting that down to the inaccurate the extensions I made. I’m not going to complain about the zip, I’m satisfied with that although I’m sure it has issues. I’m keen to have another go with different fabric and maybe with a half circle skirt instead of the quarter one here. Stitchy stitch.

Right, that is my Me Made May experience. I can’t say that I’ve thrown myself into it with complete gusto but I did make a dress and that makes me feel alright!
me-made-may'16

Birthday

birthday flowers

I’ve had a week filled with lovely birthday things. I’ve been out for dinner/lunch, twice, no! three times. I’ve had lots of awesome presents and there has been gorgeous weather. Smashin’.

I got my hair cut off too, so when I went out to dinner on Saturday night (The Five Bells in Clyst Hydon- very nice) I felt all new and swooshy. I didn’t feel so new and swooshy when we went out for lunch on Sunday (The Rock Inn on Dartmoor). A roast dinner sorted me out but, crikey, I felt rough yesterday. I took loads of pictures of Haytor whilst there, which I’ll post in a day or two.

granny blanket

I also finished a blanket, one that I’m really pleased with. I especially love the border, which is the same pattern I used for my granny shawl. It’s Stylecraft Special dk.

big granny square blanket

At some point this blanket will end up in my Etsy shop. I will sort out a link when I’ve got some blankets and other things in there.

Handmade bags

Other things I managed to finish last week were two little bag/purse type things. One is for my unimpressive collection of barely used knitting needles and the other is for keeping small projects in so I can take it out and about. I used the fabric I bought in Totnes shops during the Easter hols. They both need pressing again because I made a very lacklustre job of it.

sewing time

I had all my sewing laid out on the table. I’ve made a half hearted pledge to take part in Me Made May. Since last week, I’ve worn hand made things already and I made a dress! I’ll take pictures of the dress before the end of May, I’m sure.

Green crochet wip

Another work in progress is a new shawl. I’m doing a variation of my granny shawl just to play around. I’m using Drops Baby Merino. I went on a Drops spending frenzy last weekend. They had a sale at Woolwarehouse so I went a bit bonkers.

Drops Lace.

See! Drops. I have an idea.

next project!

More Drops. I cannot wait to start this, Cherry Heart’s Victoria shawl. Pattern bought and printed, ready to start any second.

Some new fat quarters.

Some lovely presents were received, I got a bunch of fat quarters from my mother-in-law. She went to a quilting shop in Bovey Tracey. I know about this shop but I’ve not been. It’s supposed to be good.

birthday books

I got lots of fab books. Looking forward to getting stuck into those…

My new bowls

I got these bowls too. I got loads of stuff, I won’t show it all, but needless to say it’s all good gear. One of my favourites is the drawing from the photo at the top. It’s by my friend who is an artist and graphic designer. It’s a picture of me doing me crochet! I guess I should frame it, I think it’s beautiful but then so is the subject matter, obvs.

power ranger

And then the week before last, I got this wonderful bundle of stuff from Samantha at createitsamantha.co.uk We took part in the  #craftblogclub spring clean challenge on twitter. Essentially it was a craft stash swap. It was such a lovely surprise to open up the parcel and have lots of delightful things tumble out. The Power Ranger didn’t come with my new stuff; Three year old thought I should take a picture of it. I have some ideas of what I might do, I’m looking forward to playing around in the next week or two.

pretty birthday flowers

I love getting birthday flowers!

Anyway, I’m off. Got a house to tidy and a child to entertain. Can’t watch A Bug’s Life all day. Actually, we did sit down and watch the local secondary school do a live Q&A with Tim Peak on the International Space Station a couple of hours ago (via the internet). I thought it was interesting but Three year old only managed five minutes before going off to look at a Lego book.

Patchwork knitting bag.

After many years I've finally finished my patchwork knitting bag.

I’m gobsmacked that this is actually a finished item. My skewed memory tells me I started this three years ago but it may be even longer than that.

Finished! Patchwork knitting bag.

I am properly happy that it’s all done and in use. It looks so much better than I thought it would too. I was getting bored of seeing lots of little unstitched hexagons.

My finished patchwork knitting bag!

Lots of indivdually tacked hexies sat in a paper bag for over three years. Every now and again I’d get them out of the bag to look at them and that was about it. Back in they’d go and I’d do something else instead. Eventually I found that it was time to start.

planning

I laid them out and took a picture to work from so I knew the “random” order that they’d go in.

Pieced together.

Eventually I began the slowish process of stitching them together and I was happy to discover that it wasn’t really that slow to do afterall.

Hexies stitched.

With a couple of weeks of sewing little and often, I was finished with stage two.

What it looks like from the back.

I liked the crinkle of the paper as I had it on my lap, I don’t know why. With stage two finished, it dawned on me that I’d have to actually put in some effort to move on to stage three. I knew I had to do it immediately because it would otherwise sit in the cupboard for another three years.

The pattern for this is from Cath Kidston’s book, Sew!. The book has so many lovely looking things but I have to be honest, I think the instructions are rubbish! For this particular pattern it wouldn’t have hurt to have a couple of illustrations demonstrating how to insert the lining, would it?! I had a look online but only found other bloggers or reviewers who were frustrated with it too. Nothing that helped unfortunately. With that in mind, I decided to take photos of what I did. Maybe it’ll help someone else. Or maybe it’ll just remind me how I did it, in case I fancy having another go.

And I haven’t even mentioned that the instructions were just plain wrong! It said to fold the lining fabric lengthways. They don’t mean that, they mean the other way. Who wrote that?! That wasn’t the first mistake either. The other error was to do with sewing the hexies together. When joining the outer sides together it told me to sew three rather four of the hexie strips together. If I’d done that, my bag would have had a massive gaping hole at one of the sides! Jeez! Anyway, moving on…

Making the lining for a patchwork knitting bag

Here are a few pictures showing what I did. Hopefully they’ll do the trick. Do I need some words to go with them? Already feel like I’ve written loads… I suppose I ought to.

Step1: Fold lining fabric widthways.

Step2: Measure 25cm from the bottom fold and mark with a pencil. Or line up the bottom seam of the hexie fabric with the bottom fold of the lining and mark where opening near the top sits (which should work out as approx 25cm).

Step3: Sew that bit on both sides. Then press, continuing the fold to the top of the fabric. Press a seam across the top bits too.

Step by step pictures to lining a patchwork knitting bag

Step4: I snipped the corners to avoid bulk. The instructions don’t tell you to do this but the seams are bigguns.

Step5: Put the lining inside the bag, wrong side out.

Step6: Pin stuff.

Pinning the edges. Patchwork knitting bag.

Pinning stuff.

Getting out the sewing machine. Patchwork knitting bag.

Machine stitch the lining to the top of the hexies. Do this on both sides. I think I did this after slip stitching the open sides… I can’t recall. Sorry. Mind you, on that picture above, I can’t see the any stitches. I was drinking Cava at this point so it’s a bit foggy (it was the weekend!). Not sure that bit matters, it’d probably work either way.

Attaching the handle onto the patchwork knitting bag

This was a fun bit. I managed to catch the end of Adventures in Babysitting, so I sat and watched that whilst pinning the handles in place.

Slip stitches. Patchwork knitting bag.

By the time I got round to sewing the hem down I was watching Alien. I haven’t seen it in years, it is such a good film. A proper film (not like Prometheus, ugh, terrible).

A patchwork knitting bag from Cath Kidston's Sew! book.

I’ve impressed myself by finishing it, I still can’t quite believe it. It’s good, isn’t it!?! I took the pictures of the completed article at Grandma’s house.

The only thing I might change is the green fabric at the top. It’s a bit deep and makes the bag slightly too long.

A patchwork knitting bag.

Would it be that much of a bother to unstitch it and do it again? I could take the time to shorten it but I think I’m nitpicking, it’s probably OK.

Interruptions during sewing

And I did it with many interruptions. I took many photos with a child sat on my head (see odd middle picture) and the cat kept sitting on it at any given opportunity!


I was asked via Instagram if I would like to link up with Me, You and Magoo for Crafting is My Therapy. I’ve not done a Link up before but I think I just share this lovely badge and everyone can share a bit of creativity! Is that right?

Me You and Magoo

DIY Jedi robes. Reversible, in case you want to join the Dark Side!

Homemade reversible Jedi Robes.

It’s the Easter holidays so I’m behind on making stuff. I will be relatively quiet here until the week after next. It’s amazing how having an extra child at home creates so much more work. There has been a birthday too, which has made me busy.

mini chocolate muffins instead of a big birthday cake.

Mini birthday chocolate muffins. I guess you could argue that the star decorations were part of a Star Wars birthday theme but I didn’t twig until just this second that there was a connection.

The ever evasive Darth Vader

Anyway, on to what I’m here for. I made a Star Wars costume for a three year old. For a bit of diversity I decided to make it reversible. This gave the boy a choice of whether he wanted to be a Jedi or give in to temptation and join the Dark side.  I think it is safe to say that he has joined the Dark side. I knew he would, which is why his big brother models the Jedi version. Not sure I’ve got my priorites right by buying him Kylo Ren’s lightsaber but whatever, he loves it.

Start Wars fancy dress. DIY Jedi robes. And they're reversible so you can turn to the Dark side!

The robes were actually really easy to sew. I’ve made a dolls dress before and Coraline’s coat, both of which follow the same basic pattern. I used this tutorial and made two (without hemming): one in brown and one in black. With right sides together, I sewed them together, leaving a gap in the bottom so I could turn the whole thing the right way round. Initially you ignore the sleeves, tucking them in whilst you stitch around everything else. Once it has all been pressed (don’t melt your cheap fabric like I did), the sleeves can be tucked into each other and their hems both folded to the inside, where they won’t be seen. A little bit of top stitching sews them together. Top stitching around everything else also tidies it all up and stitches closed the hole at the bottom.

Spiderman as Darth Vader

Because it is just a fancy dress costume I wasn’t particularly careful about how it all went together, I’m pretty shocked that it worked out. I cut out the black fabric first and used it as a template for the brown so they’d both be the same size. I had some minor unpicking to do at the beginning where I messed up the shoulders. And I had some mighty gathering to do on the hood because it was so much bigger than the neck bit (it is supposed to be big though).  I think it’ll get too short very quickly and the sleeves are too long. Other than that it all kind of worked. Three year old stomped around the house in Vader style and had a great time (there was even hands on hips and heavy duty breathing).

Jedi in training.

Both boys got right into the spirit of it, which I loved, especially as my eldest hates dressing up and will usually refuse. My efforts rewarded, phew!

Oh and I forgot to take pictures as I made it, so I can’t show a step by step thing. It’s not so important with the robes as I’ve linked to the other tutorial. The top was really easy. I had two rectangles and I snipped in a v neck. I sloped the shoulders slightly (downward towards the outside) then stitched them together. I quickly (and shoddily) hemmed all raw edges and left it open at the sides. It is tied down with a belt, which is a strip of leftover brown fabric that I folded in half lengthways (with raw edges tucked in) and top stitched.

Hand painting. This is making art.

Then, after Star Wars shenanigans, they did “art” or, in other words, they painted themselves…

red handed

Such a mess.

Blue man

So yeah, that’s it really…. Back soon. x

FYI, I bought a metre of the cheap linen type stuff and used half (it was 60″wide) and three metres of each of brown and black, which about the right amount. I wouldn’t get any less than this. It was 45″ wide. I got it all from Amazon as I only needed cheap stuff. I usually only get fabric online if I don’t care much about the quality.

Catching up with old projects and starting new ones. WIPs.

Making a patchwork bag.

This is going to be a bit of a random post today. I’m chucking up pictures of where I’m at this week. There isn’t a theme as such, just things I’m tinkering about with.

hexies

I’ve had all these hexies stored away in a tatty old paper bag for about three years. I think I was knocked up when I was sewing the fabric to paper and now my boy is turning three soon. A long time.

backs of paper piecing

With spring on its way, the change in season has created a new surge in enthusiasm. I have the painstaking task of hand stitching them all together. It’s actually not that bad. Think I put it off for so long because I thought it was going to be a nasty job. I’m enjoying it!

paper piecing hexies.

I’m not going to go nuts, it’s only a bag. It’d be a definite labour of love to go bigger. I’ve got a patchwork blanket my Nanna made for me, I think she was at it for years.

not a very exciting photo

Next: a pile of Jedi appropriate fabrics. Both my boys have birthdays on the way so they will each have something Star Warsy. If I’ve got enough fabric, I’m thinking reversible robes. They can decide whether to be a Jedi or join the Dark side! Not sure how this’ll work right now but I’d better get on with it.

new sewing project.

For me, I want a summer dress. I saw a really pretty one on Instagram about a month ago, did some nosing and found out it was the Charlie Dress from Simply Sewing magazine. The pattern was spread over two issues and it was the second issue that was in the shops. I ordered the back issue of the first one and it arrived within a week. I’ve sorted the pattern pieces and dug out some ancient fabric from the depths of my fabric drawer. Fingers crossed I will actually do this. I have repeatedly got to this stage with many a dress pattern over the last few years. Then all stops. I chuck it all back in the fabric drawer and forget.  I think I’m pretty consistent like that.

Beginning something new

Also kicking about is my sweety tin. My sweety tin is a good size for keeping embroidery type projects in.

bits for hoop art.

I’m not very far ahead with this. I’ve drawn a rough sketch of what I want and now need to sort out all the little bits for it. Not sure how it’ll turn out, it’s more of an experiment at this stage. I just really enjoyed making my spring flower stitching a few weeks ago and want to play some more.

A new crochet ripple baby blanket.

Then there is an actual finished thing. A baby ripple. I’m going for the plain border. I wasn’t sure. I guess I could add something a bit snazzier but feel like I’m finished with it.

I thought that was it for WIPs but I’ve got that knitting kicking about somewhere.

It feels a bit weird to write this post as I reckon I’ve mostly been banging on about crochet for the last few months. This has actually been quite effective because traffic here has gone bonkers (relatively speaking). It’s tempting to try and force new crochet ideas upon myself to keep up with momentum. Not gonna do that though. Since I don’t get paid for blahing about my hobbies I’m going to carry on and do whatever I fancy. But it is lovely to know that people like things I do, so, thank you. I’m loving it here. x

First time putting real things on Etsy!

Spring set of needle cases.

I don’t usually visit here over the weekend but I’m here to quickly link to my Etsy shop, which I have now added things to! Go me! Not sure how well these needle cases will do. They are needle cases after all, a bit too specific maybe. At the time I didn’t know what else to do with the embroidery I’d done. I actually would like to just present them on their hoops in future. They looked so nice like that. Any way, here is the link and some pictures. Have a lovely weekend!! X

https://www.etsy.com/uk/shop/ZeensandRoger

Handmade felt needlecases

stitching daffs. daffodil embroidery almost completed snowdrops stitching.Snowdrops embroidered needlecase Snowdrops embroidered needle case Hyacinth needle case standing Hyacinth needle case Hyacinth embroidered needlecase Daffodil needle case back. Daffodil embroidered needlecase Daffodil embroidered needle case standing