How To Crochet A Granny Square Bag

Handmade Granny square bag pattern

Sudden Crochet Inspiration

I had no idea that I was going to make a Granny Square bag last week, no idea at all! I was dashing off somewhere and felt I could do with taking a little crochet project with me. Hurriedly, random balls of yarn were grabbed and off out I went. Those random balls of yarn were about to become granny squares, which were about to become a yarny, patchwork bag! Yay!

I didn’t have enough yarn to crochet a blanket, which made me wonder what else I could turn the colourful granny squares into. I considered making a cushion, but what got me really excited was the idea of a crochet bag! It’s a tricky thing to take a picture of, the bright colours shout so loudly that they blow the pics out!

I used leftover yarn stash of Paintbox acrylic aran yarn and, just because I fancied it, used a Join As You Go method.

Make a Crochet Granny Bag

To crochet your own granny square bag, you’ll need a few things. Here they are:

  • Colourful yarn in various colours (I used aran weight, but any yarn is fine).
  • 4.5mm hook (if using a different weight, make sure to use the right sized hook for the weight of yarn you use).
  • Bag handles (I recommend searching for “long bag handles” on eBay or Etsy, that’s what I did!)
  • Lining fabric (something measuring a couple of inches bigger than your finished crochet piece)
  • Darning needle for when you’re sewing with yarn
  • Pins, sewing needle and thread for when making up the lining.

The main body of the bag is a bog standard gang of grannies; super quick and easy to do! Rounds of three, joined together in 8 rows of 5 squares (you’ll either need more rows or more rounds for each square if you’re using DK yarn; check out my tutorial for a double knit version here).

My piece measured 15.5 x 27 inches (40 x 68cm).

Making a granny square bag using leftover yarn

How to Place Colours in Crochet

Every now and again, it is worth checking to see that the spread of colour is even. I eyeball the colour layout for the granny squares, taking into consideration how colours look when they sit next to each other. I also make sure to know what I’ve got left in stash so that I don’t accidentally run out of a shade halfway through. If you take a look at the picture above, you can see that the colours are evenly distributed.

Adding Handles to a Crochet Bag

Once the main body of the crochet bag is complete,  the handle sections need to be shaped. It’s not as tricky as it looks, and luckily, accuracy is not paramount. I don’t mind a project that needs a bit of bodging, and crochet is usually very forgiving when it comes to bodging! Not that you need to bodge it, I’m just saying!!

Note that UK terms are used (a UK treble is a US double crochet)

  1. At one end of the main body (right side facing), work a strip of granny clusters starting with a ch3 and 1tr in the first st and ending with 2tr on the last stitch of the row. Straddle the square joins with (1tr, tr2tgr, 1tr).  You can kind of see what I’ve done on the picture above, but I also show you how to add this edge across granny squares (about 2:40 into the vid)
  2. Turn the work. Ch2,  1htr in each stitch along to the end. Turn.
  3. Ch1, slip stitch along approximately 10 stitches (you want the narrow section to be the same width as the handle slot). Ch2, 1htr in each stitch along, missing the last (approx) 10sts. Turn.
  4. Ch2, 1htr in each stitch of the last row. To widen the work again, ch13, Turn.
  5. 1htr in 3rd ch from hk. 1htr in each st along to the end. Continue by adding 10 more stitches using a chainless foundation half double stitch. This is actually lovely to do, I promise. I have a video that shows you how, it’s here:  The Foundationless Start. Skip the first bit of the video (that explains the same technique for a UK dc). Turn.
  6. Ch2, htr all the way along. Turn.
  7. Repeat row 6. Fasten off.
  8. Repeat 1-7 on the other end of the bag.

Next, with the right side facing, evenly stitch UK doubles (US single crochet) all the way down the edge of both lengths. Don’t fasten off yet…

Fold the granny square bag in half and, using the yarn still on the hook, slip stitch the sides together. Repeat on the other side.

Tuck the handle bits through the handle holes/slots, then fold down to the inside and pin, ready for sewing closed.

The stitches don’t have to be super neat. If you use matching yarn, you won’t see if you’re making a dog’s dinner of it! Try not to come through to the right side, though, or if you do, make the stitches small, so they’re not staring at you. Don’t forget the top bits at the ends.

Lining a Crochet bag

Add Lining to Your Crochet Bag

Next, you need to add the lining. It’s not 100% necessary, but I think it looks better, and you won’t have your stuff escaping through granny holes!

Fold a length of fabric in half, right sides together. Place the granny square bag on top and mark/draw where you need to sew. Also, mark where you want the fold of your top hem to go. Sew down both sides to make the bag cavity. Next, iron the seams nice and flat. At the same time, fold down the top hem and press. I went back to the sewing machine and top-stitched the hem.

Tuck the lining into your bag, pin it in place, and hand sew the top of the lining to the top of the crochet! And there you have it, a crochet bag of your own!

Retro granny square bag. Free crochet pattern
Granny square crochet bag pattern
A granny square crochet bag

Oh goodness, I think I need a course in how to photograph bright colours!!

I would absolutely love to hear from you if you make one of my designs. If you do, please give me a shout. I’d love it if you said Hi! Don’t forget that I’m on Ravelry, so your makes can be added there. Oh, and I almost forgot Instagram!

And don’t forget to check out my other Free Crochet Patterns, right here on my blog. Not to mention some super useful Crochet Tips & Tricks, here!

Thank you. X

Subscribe to Blog via Email

Enter your email address to subscribe to this blog and receive notifications of new posts by email.

Episode 3 of a Crochet Podcast

Hello everyone! Do you love crochet? Come and watch Episode 3 of my crochet podcast (or is it a vlog?!). It would mean so much if you spent a little time with me. I’d love to hear what you think.

Yarn and Patterns I went on about:

The Wool Kitchen

The Crochet Project -the Humbug Scarf (and I was calling it a shawl!)

Ravelry Group

Below are some pictures of pretty much everything I spoke of in the episode! All the new hand-dyed yarn from the Edinburgh Yarn Festival, the finished objects and everything in between. I hope I haven’t left anything out. Does the Pink pop yarn remind you of sweeties?! I went out and bought sweeties especially!

More Hand Dyed Pretties

Thank you so much! Now off to play with wool! XX

Subscribe to Blog via Email

Enter your email address to subscribe to this blog and receive notifications of new posts by email.

Save

Save

Crochet Easter Egg. Video Tutorial & Pattern

Crochet Easter Eggs With Embroidered Flowers

Doesn’t it feel like Spring already?! That means Easter is just around the corner. You may recall that last year, I came up with a cute little pattern for crochet Easter eggs. The surprisingly awesome outcome is that it has been a really popular pattern (mostly thanks to Pinterest, not anything I’ve done).

To accompany the written crochet pattern, I thought that it would be useful if I did a video tutorial demonstrating how I crocheted little Easter Eggs. The flowers are a simple but very pretty finishing touch! I show you how to do those, too!

And it is not just any old video tutorial… it is my first ever video tutorial! It’s apparent that I need to perfect my video-making skills somewhat, but you’ve got to start somewhere! I hope you find it useful.

Crochet Easter Egg Video Tutorial

The written crochet pattern is super straightforward and quick to do. The How-To video is probably best viewed as a companion to the written instructions. In the video, I also demonstrate how to embroider the stitches, which the written pattern does not do.

If you want to jump straight there, the time stamp for the decorative embroidery is 18.25.

Had I been more YouTube savvy, I could have made two different videos. One for crocheting the Easter egg and one to demonstrate the embroidery. But I didn’t think about that until afterwards!

If you fancy having a look (afterall, Easter is coming up pretty soon) then please click on this picture to take you to YouTube! Or go HERE. And then let me know if you’ve made some!! I would absolutely love to see. Cheers! X

If you enjoy making these pretty crochet eggs, take a look at my other free crochet patterns here!

How to crochet an amigurumi Easter Egg video

Subscribe to Blog via Email

Enter your email address to subscribe to this blog and receive notifications of new posts by email.

Save

Crafty Crochet Catch Up for Spring.

giant-crochet-granny-square

Hello!! How is everyone today? I feel a bit funny. I think I’m slightly overwhelmed. Thank you so much for being so very kind about my first foray into crochet vlogging. It was absolutely awesome to hear from all of you. I go from being all casual about it to feeling extreme nervousness. I think it mostly went well.

I’m looking forward to filming another crochet vid next week, and I am wavering ever so slightly about filming a crochet tutorial this afternoon [edit: I tried, ugh, it was bad: tech issues, focus issues, brain issues. I will try again]. If you didn’t see my last post, please check out the crochet vlog here. Anyway, this is a crafty catch-up, so let’s get moving…

mini-crochet-circles

A Stash Busting Crochet Blanket Idea

I still had lots of  Stylecraft Special dk left from my Crazy Chevron blanket, so on Sunday, I made 48 little crochet circles. I was thinking baby blanket. I was also thinking of doing a continuous join-as-you-go. I can’t do one of those, though. I guess that I’d need a minimum of 4 balls of the same colour for that. This is part of an ongoing stash-busting endeavour, and I’m trying to avoid bringing in more yarn. I kind of did buy two extra balls for this already, and I’m going to run out of the blue (lobelia) soon. Oh, it’s an instant fail.

colourful-crochet-circles

All 48 crochet circles now have three rounds. I could square them up to join-as-I-go and use different colours, but would it be more interesting to try something new? Eeh, I don’t know, there’s no rush, is there? I think I’m going to go for more, too. Apart from the lobelia, there looks like there’s enough for another 48 circles. Any joining suggestions?

rowan-stone-washed

At the beginning of last week, I got a lovely surprise when Posty brought a parcel to my door. I wasn’t expecting it, but I knew instantly who it was from because of the massive label greeting me on the box. This Rowan Stonewashed yarn was a gift from my friends (I can call them that now, can’t I?) at Wool and The Gang. I’ve been lucky enough to have been sent their yarns before. If you fancy checking them out, you can read about my mohair experience here. And my gargantuan (yet super warm) Foxy Roxy scarf here.

rowan-stonewash

If I’m being totally honest, the stonewashed yarn is not what I’d normally go for. But they asked me to play with it, and that’s what I’ve done. I like it, and I’ve enjoyed being coaxed out of my comfort zone.  I’m always up for a yarny challenge!

The yarn is a collaboration with Rowan Yarns, which I classify as high-end yarn. There are free patterns on the Rowan website for garments and shawls using this yarn.  I couldn’t put my finger on what it reminded me of for ages. It’s marble! It reminds me of marble! There’s kind of an Art Deco quality to it, whether or not that was what was intended!

mini-crochet-purse

I’ve made three little crochet purses out of the two balls they sent me, and I’ve made some snazzy tassels too. I’ve not put the zips on yet, so I’ll come back with pictures when they’re done.

simple-t_shirt-yarn-bag
cute-little-bag-using-t-shirt-yarn

A Crochet Bag With T-Shirt Yarn

Next up is this cute little crochet bag I put together. During half term, the boys and I went on the bus to Exeter to visit the dentist (living the high life) and happened to fall into Flying Tiger. I came out with two balls of t-shirt yarn, and I won’t mention the bagful of other random stuff.

I’ve briefly shown on the new crochet vlog a spiral technique I started. The spiral turned into a bag, and the bag has turned into a written pattern! Just like that!

Well, not just like that. At this point, I say a massive Thank You to my IG friends (including my fellow WordPress pals Eleonora of Coastal Crochet and Teresa of Shirley Rainbow) who tested the pattern for me. Majorly helpful, without you, the pattern would have been a mess, so thank you very much indeed!!

stashbusting-crochet-granny-blanket

I’m now going to bombard you with pictures of a giant granny blanket….

simple-granny-border

This has been another crochet stashbuster for my leftover yarn. I’m so happy to have finished it. I didn’t know it at the time, but it was destined to become a birthday present for someone in the family. Stylecraft Spesh DK again.

All the colours that had nowhere else to be but with each other. I rather like it. A proper Granny blanket, don’t you reckon?!

granny-blanket
giant-granny-square
crochet-in-the-home

Such is my commitment to getting this to its destination, I managed to drag myself to the post office even after I’d fallen over and torn a hole in Brand New Jeans!! A week later, and Youngest boy is still asking why I fell over.

Because I did. It was slippery, it was down a steep slope, and I was wearing New Clothes. That’s why! There’s nothing quite like holding back your own tears whilst a boy of nearly four cries for cuddles with Daddy… because Mummy fell over.

Subscribe to Blog via Email

Enter your email address to subscribe to this blog and receive notifications of new posts by email.

Save

Save

Save

Oh, What Have I Done?! My New Crochet Vlog!!

Hellooo crochet friends!!

What you’re about to see is somewhat of a car crash shambles of a crochet podcast, but I’m biting the bullet and hitting publish. I could make more attempts, but I reckon that’ll just prolong the agony.

So here we go, take a short journey to YouTube to check out my Zeens and Roge Crochet Podcast!

Here is how it happened….On Wednesday morning (without really knowing what was going to happen), I got out my tripod and camera, hit record and just started talking.

After that, I put the files on the computer, downloaded a little jingle and then did what I usually do. I asked my husband for help! He just knows stuff. He found me a free bit of video editing software, and within a few minutes, he knew how to use it. I dutifully sat and watched, trying to take it all in. He’ll hand over the reins at some point, and it’ll be me in charge. Oh crikey, what have I done?!

It hasn’t been plain sailing. I tried editing the crochet chat on my own at first and really messed things up. The computer crashed twice, and a twenty-minute video took four hours to upload! What’ll happen when I want a longer episode?! There is so much to learn about making your own crochet podcast, but I also think this is a skill worth learning. Wish me luck, won’t you!? And please subscribe to my new YouTube channel!! It’s basically going to be crochet crochet crochet!

crochet chevron blanket in my crohcet podcast


Save

Crazy Crochet Chevron Blanket

bright-crochet-chevron-blanket

For a relatively small blanket, this zigzag chevron blanket seemed to take forever. I’ve made crocheted chevrons before, but not for a long time. I now know why. Every stitch is so small that the build-up is mega slow (yet very much worth it).

neon-pink-crochet-bobbles

Crochet Chevron Blanket

It took a good week to get into the flow of the zigzag stitches. Once I could see that the colours were making me happy, I sped up and started to enjoy the rhythm of it. It’s a classic crochet chevron pattern, with stitches worked in the back loops only. I used this chevron pattern from Meet me at Mike’s, which has step-by-step photos.

I think I worked 11 multiples of the stitches, maybe 12. I thought that would create plenty of width, but it’s actually a lot smaller than I was aiming for. The nature of the stitch created a concertina effect, with it squishing in on itself dramatically. If I stretch it out, it does look bigger, and I think that if I give it a wash, it should settle down more.

old-border

Adding a Crochet Border to Zigzag Blankets

The border was a bit of a pain. I knew I wanted the blanket to have a crochet border, and I also knew that many zigzag blankets don’t have them. Probably for a good reason! The valleys and peaks created by the stitch mean that you have to fill those spaces in.

Sadly, I no longer have links to the ones I used to make the border. However, all the yellow bits in the pic below are worked separately. Then the blue was sort of “coloured in” in the spaces.

straightening-the-crochet-chevron

I wish I hadn’t added a second row of the cloud blue dc stitches (US single crochets) over the top. It looks a bit messy, and it really doesn’t need to be there. By the time I’d got to this section, though, I’d already unpicked a first, super-ugly border attempt. I was fed up. I just could not be bothered to do it all again (I’d already gone round with the grey at this point too, as I had done the first time too). So if anyone out there fancies having a go, perhaps don’t add a second row of blue!

complete

Crochet Bobble Edging

I thought the grey was going to be the final colour, but the blanket’s recipient (Youngest boy) came over and told me that he wanted the neon pink. He knew what he was talking about. It looks fabulous. I seriously love it! You know, I think grey would have been nice on its own, but now it really pops!  (and I don’t use that word lightly-  I never ever say “pops”).

There isn’t really a pattern for the full border in its entirety; it’s just pairs of 2 UK treble stitches sitting next to each other and ch1, miss a stitch. It would look something like this in a pattern:

UK terms – Round 1: *2tr, miss 1 st, ch1; rep from * around.
US terms – Round 1: *2dc, sk 1 st, ch1; rep from * around.

The bobbles/pompoms are a little stitch pattern I came up with when I crocheted a Touch of Spice blanket nearly a year ago. This time I chained 6, not 7, made my tr5tgr in the 4th ch from hook and chained 2 rather than 3.
Pop over to the Pompom Edging blog post and take a closer look.

crochet-chevron-blanket
colourful-crochet-blanket-chevron-pattern

Order of Yarn Colours

Essentially, this was a crochet stashbuster of a blanket. I had so much Stylecraft Special dk acrylic that it needed to be made into something lovely and not stuck alone in the dark cupboard under the stairs.

I’m going to say that it was mostly random colour choices, but there is a pattern repeat:

  • Six rows of one colour,
  • 3x two rows of different colours,
  • 4 rows of another colour,
  • 2x two rows of different colours,
  • finishing with six rows again.

I’ll also tell you the colours because I’m super proud that I remember them all off the top of my head: Fiesta, Grey, Citron, Wisteria, Aspen, Shrimp, Sherbet, Cloud, Kelly, Apricot, Lobelia, Fuschia, Plum, Pistachio.

on-the-banister-my-favourite-crochet-chevron

And I’ve still got enough to make another sort of blanket…because there’s a chance I might have gone out and bought some more… you know, to make up the colours….Soooo…. what next? Granny squares or treble chevrons, maybe a sunburst? I’m torn.

Subscribe to Blog via Email

Enter your email address to subscribe to this blog and receive notifications of new posts by email.

Save

Save

Save

Crafty Crochet Catch Up…

i-love-this-picture-daffodils-with-my-crochet-cushion

A Roundup of Current Crochet & Crafting

It’s been a while since I had a round-up of current crafty WIPS. Today is the day to remedy that by sharing all the crochet.

chevron-progress
crochet-chevron

This colourful crochet chevron has been my main focus. It’s a very jolly, bright blanket.  I’ve wanted to make one for ages. I gathered all the yarn colours together in October, but they sat in a bag for months.

I think I made over 200 stitches for the foundation. Unfortunately, the chevrons have a concertina effect, and it’s smaller than I wanted.  I’m thinking about how to square off the zigzag for the border next. The chevron pattern is called the Zali Zigzag blanket from Meet me at Mike’s.

pistachio-humbug-crochet

The Humbug Scarf

I’ve made a start on the Humbug shawl with a pistachio coloured wool from Blacker Yarns. The 4ply yarn was a Christmas pressie from Becki at The Dartmoor Yarn Company. The pattern is by The Crochet Project, and I got that as a freebie for naming it! (Always happy to mention that). I started it a few weeks ago, but put it down for a while. Last weekend I did a few more rows, and I’d like to see it grow some more.

crochet-mandala

Pretty Crochet Mandala

I made a crochet mandala in yucky colours. Ok, they’re not yuck. Just not seasonal. I don’t have a vast collection of cotton DK yarn to choose from. It seems I need some spring colours.

It’s a great crochet pattern, though. It’s a free crochet pattern called the Magnolia Mandala by Crochetmillan

crafty-messing

The idea was to stitch it over a gaping hole in my jeans. It turned out that a great big doily stuck to my haunches was gonna look pretty silly so the idea was binned….

embroidery-on-jeans

…in favour of something more subtle.

I’m happy to wear my jeans with a piece of Liberty fabric and floral embroidery. I quite like how this Make Do and Mend approach turned out.

 I’ve got another pair of jeans waiting to have similar crafty treatment, but this time the affected area is around the other side. Do you know that awful feeling when you realise you’ve been walking round in public, all day, with a split in the seat of your trousers?! I do.

nebula-the-wool-kitchen
custom-dyed

Hand Dyed Yarn Purchases

I made a couple of naughty yarn purchases recently. I’m arguing that this is still Christmas money. Not sure how long I can get away with that excuse, though. The pale one is a dye job I requested from Rhapsodye Yarns, and the other is called Nebula, glorious neon zip yarn from The Wool Kitchen. Both are aran weight.

crochet-triangles

Both new yarns are for my continuing experiments with crochet triangle infinity scarves. Once these are done, that’s it. No more messing about with triangles. I have to draw a line under this project.

Still, I’ll make the most of the crochet triangles while the yarn lasts. And maybe I’ll wear one of these to the Edinburgh Yarn Festival next month! That’s right, I got me a ticket!! I’ll be there with my sister on the Saturday. My birthday is the beginning of May. Do you think I can wangle some birthday money in March?!

ugly-granny-crochet

Once all the other stuff is done, I’ll pick this up, a stash-busting granny square blanket. I like getting it out every few weeks. It feels like a new project each time I work on it.

flapjack

And last week, one of my boys and I made flapjacks. Not technically a crafty thing, but nevermind.  I forgot how yummy they are. I can even eat them when I put raisins in them. That means they must taste good; everyone knows how much I don’t like raisins! Maybe we’ll make some tomorrow too.

inside-crochet-mag

Also, I can’t believe I forgot to mention my mini interview in Inside Crochet magazine. What a chump! I was so excited to see it in there, too. It’s the “Blog We Love” section. Get yourself a copy. Lots of fabulous patterns too. X

Subscribe to Blog via Email

Enter your email address to subscribe to this blog and receive notifications of new posts by email.


Save

Save

Wool And The Gang’s Foxy Roxy Scarf

good-storage

Knitted Foxy Roxy Scarf

Do you remember when Wool and The Gang asked me to review their new Take Care Mohair, and I thought they’d made a mistake? Well, it can’t have been much of a mistake because they got in touch again to ask if I wanted to try out one of their other knitting products! Result!

Today I’m here to tell you all about how I made my Foxy Roxy knitted scarf.

crazy-sexy-wool-midnight

I chose the Foxy Roxy scarf from the WATG Hygge LookBook that I was sent to peruse. I could have chosen something to crochet, but I was seduced into going a different route. I’ve mentioned in the past that I’d love to knit more (I can do the very basics, but that’s all).

The sock knitting phenomenon still eludes me, but I do see lovely knitted shawls out there. Maybe one day…. Anyway, I thought the Foxy Roxy would be a good introduction to the world of knitting, and the fact that I was being sent the kit would be a good kick up the bum to get something done.

got-my-basics
watg-kit

The kit included five balls of Crazy Sexy Wool, some fab knitting needles, the pattern and a little label to pop on the finished project. I just love the packaging it all comes in ( I didn’t take pictures this time because my mohair review has those).  It was Christmas again when the box was brought to my door!

wool-and-the-gang-crazy-sexy-wool

I chose Midnight blue, but it really was hard to decide (there are so many colours…). In the end, I went with the sensible choice. I knew that I’d wear a shade of navy. And it’s true, I’ve been wearing it non-stop since I downed needles a week ago.

the-beginning
it-begins

Relearning How To Knit

I took it easy at first. My parcel arrived the Saturday before last, and I knitted up half a ball that afternoon and the second half the day after. By Monday, I’d gotten into the swing of things; I caned through the last four balls in less than three days.

For a couple of rows at the beginning, I kept stabbing through the yarn with the pointy needles (these are proper vampire slaying needles). After a few rows, that stopped, and I got into a good rhythm. It seems I respond well to the noise of needles. It might be the main reason I fancy taking up knitting. The noise of these chunky knitting needles is hypnotic, and I really enjoyed the woody clacking I made with my chunky stakes.

And oh my goodness! No achy hands! I’m used to achy hands when using a giant crochet hook, but I must hold needles differently, cos no ache this time!

half-way-there-big-knitting
knitting-with-cake-and-tea

Obviously, I needed tea and cake to help me along the way, but I did get a few crumbs on my stitches [I use the best lemon drizzle recipe there is]. I needed the energy to keep on with all the rows of knitting.

One ball in and I could see that this Foxy Roxt Scarf was gonna be loooonnng. To be honest, I have no idea if there are more rows than the pattern told me. I didn’t count. I just kept going until I ran out of yarn. I got carried away with this and didn’t have enough to cast off.

At that point, I had to take an enormously deep breath and frog a few rows. I gathered each stitch slowly and carefully back on a needle and knit back on a couple of rows before trying the cast off again. Here, I have to admit that I don’t actually know what a row looks like. I think it’s both the wiggle chain things per row and not half of one of these. Is that right?! Er, I don’t know. Whatever the weather, I now have a knitting project under my belt, and I am proud!

foxy-roxy-watg
snear
my-foxy-roxy-scarf-watg

Thank you to my eldest boy for taking some amusing photographs of me. It was very good timing that he was off sick from school. I made him take a squillion pics. To help him, I even cracked open the tripod that I bought a year ago.

Why haven’t I ever used the camera tripod before!? It makes life so much easier. Duh. How snuggly and cosy does my new knitted scarf look though!? It is flippin’ gorgeous, I love it. I know it’s wrong, but I’m wishing for colder weather so I can enjoy laughing at everyone else in their piddly little, ineffectual scarves. I will be super warm and happy! Gleefully, manically laughing, I expect.

All I will say is this: when wearing it, I will have to learn to be careful. Yesterday, as I casually sauntered home from the school run (probably with a little hint of scarf smugness too), a great big gust of wind took my scarf and threw it in brambles. So embarrassing. I was there for an eternity, carefully and not so casually untangling my precious new, hand-knit scarf.

the-longest-scarf-in-the-world
marceline-tortoiseshell-lovely

I’ve only included a picture of the cat, due to the fact that she was watching me whilst I took the photos.

Subscribe to Blog via Email

Enter your email address to subscribe to this blog and receive notifications of new posts by email.


Save

Save

Save

Corner to Corner Broken Heart

broken-heart-corner-to-corner-crochet

What Becomes of the Crochet Broken Hearted?!

Coming up to February, hearts are everywhere. I get it, love is in the air and all that, but what if you don’t want to get all schmaltzy and saccharine about it?!

This is my answer: crochet a broken heart! I’ve come up with a crochet corner-to-corner graphgan design that’s cute but not pukey. How great is that?! To make your own crochet heart, read on…

crochet-heart-cushion

I chose neon pink (almost impossible to photograph by the way) and a light grey aran yarn. I was all set to go for a blue background colour until I found out I didn’t have enough yarn. This pattern needs two balls of the grey and one of neon pink, with just a scrap of blue for the shiny reflection.

a-broken-heart-stitch-fiddle-pattern

I recently learned about a chart making website called Stitch Fiddle. It’s brilliant! You can make up your own crochet designs for knitting, cross-stitch and crochet. It’s free to do the basic stuff, but I’m tempted to sign up for the fancier version. You get fifteen freebies; after that, you have to pay.

I haven’t used it to do crochet diagrams yet, but I’m probably headed that way.  Anyway, I’m not here to sell their stuff. I shall move on…

Above is the graphgan chart to use. I think it can be printed off if you save it as a document, then you can mark off the squares as you go. I started in the bottom right corner.

broken-heart-crochet-c2c

Things Needed to C2C a Broken Heart

  • 2x 100g balls of background colour, 1x ball for heart, a few metres of a third colour. It’s aran weight yarn
  • 4.5mm hook. (If you have a particularly loose tension, try a 4mm).
  • 1x 50cm cushion pad
  • 1x 50cm cushion cover
  • Sewing needle (not as giant as a darning needle, but big enough to squeeze the yarn through, it needs to go through the cushion cover).

Before you begin, the first thing you need to do is separate out about 20 grams of the grey yarn, this will be the ball you use to work between the two heart pieces. The thing about making crochet graphgans is that you need a ball/bobbin for each section of colour. I had three grey and two pink balls being worked at the same time (I wound a separate ball of the pink yarn too, just under half). It’s not as tricky as it sounds, I promise. It’s very hard to explain, but very easy to do! As long as you know how to Corner to Corner, this is really simple to achieve.

I learned how to do a C2C from a pattern I got from Ravelry, but I’ve found this video by Bella Coco, which I wish I’d seen at the time!

Here is a video about colour changes. It was immensely helpful and got to the point. No faffing, thank goodness.

back

I kept all my workings on one side (it’s a cushion, they’re not going to show on the wrong side). To avoid lots of these, make sure you keep one ball of pink for one heart half, and the other for the other. There are a couple of places where the yarn would be carried over too many blocks if you didn’t split the yarn, and that might look messy. If you look too closely at the picture above, you can see where I broke that rule. Just don’t look.

pinning

Pin your finished piece to the front of a cushion cover. Pin the four corners first, then add a couple more pins inbetween. I found my cushion cover from Amazon, it was about £3, which is better than the £4.50 it would have cost to buy two more balls of yarn to do a plain c2c back, and more time efficient. Woohoo for saving time and money!

sewing-on-to-the-cushion
stitchy-stitch

Stitch it on. The ends can be woven in when it’s finished.

sewn-up
crochet-cushion

Keep the stitches as close to the edge as possible.

cosy-cushions

Finished! A giant crochet cushion with a broken heart!

Let me know what you think. Do tell me if you make one, I would absolutely love to see it. Please feel free to make as many as you like, and why not check out some of my other free crochet patterns!? Thanks.

Subscribe to Blog via Email

Enter your email address to subscribe to this blog and receive notifications of new posts by email.

Thistlebear

Save

Crochet Triangle Infinity Scarf

self-striping-yarn-rainbow-crochet-infinity-scarf
Geometric Crochet Love

My love for crochet triangles all started when I was playing around with geometric patterns for crochet. It became a conscious thing last summer when I made my  C2C crochet cushion. Since then, I’ve seen triangles all over the place. I now absolutely love geometric patterns in crochet!

crochet-triangles-cowl-infinity-scarf

Crochet Cowl Inspiration

I’m on a mission to make the perfect crochet cowl. I know exactly what sort of design I want, but have struggled with translating it into crochet. Basically, if you take a look at my pattern Pinterest board, you’ll get the idea.

I’d love to intersperse different colours amongst the triangles for my cowl idea. So far, I’ve resisted just doing colour changes for random single triangles, as it could potentially compromise the structural integrity. I might have to try it though, just to find out how safe and secure it would be… Hmm, anyway, I’m glad to say that I’ve found the ideal cowl/scarf pattern to play with.

crochet-cowl-monochrome-triangle-infinity-scarf

Crochet Triangle Infinity Scarf

The best crochet cowl pattern I’ve recently come across is called the Triangle Crocheted Infinity Scarf from Friendly Nettle. I totally love this pattern, it’s utterly fabulous, and I know lots of other people feel the same way because my Instagram mates have gone nuts for it too!

paintbox-yarns-simply-aran
cosy-monochrome-crochet-cowl-triangle-infinity-scarf
rainbow-bright-crochet-triangle-infinity-scarf
Triangle Cowl Pattern

The pattern is very simple and Rasa, the designer, has made things super helpful by providing loads of pictures, a video tutorial and pattern diagrams. As I’m I can’t help myself, I did change a few elements to the original pattern.

My first two cowls were made with Paintbox Yarns Simply Aran, so I didn’t need as many triangles in my starting row. I think the tri-colour version of the infinity scarf (cowl) has thirty triangles, and the monochrome one was twenty six. Each cowl has fifteen rounds for the main body (plus the first and last rounds of UK htr stitches).

monochrome-crochet-triangle-cowl

When working the crochet triangles, I made 1dc (UK), 1htr), 1tr and 1dtr. This sequence is different to the original pattern (I messed around with a few different stitch sequence experiments. I was curious to see what would happen to the shape of the triangles). You’ll need to see the original pattern to work out where these stitches go! I wouldn’t want to give away too much of the original pattern as it isn’t mine.

My edging was also added to, but nothing particularly fancy.

rainbow-triangles
Self Striping Yarn

The final triangle cowl I made was this crazy rainbow job. It’s a double knit, self striping yarn from Rhapsodye Yarns, which I was really intrigued by.  The number of triangles in the starter row was increased by a couple more to make the cowl a good size. Double knit yarn is finer than aran weight yarn, so adding more triangles was necessary for a good fit. I pretty much used the whole 100-gram skein.

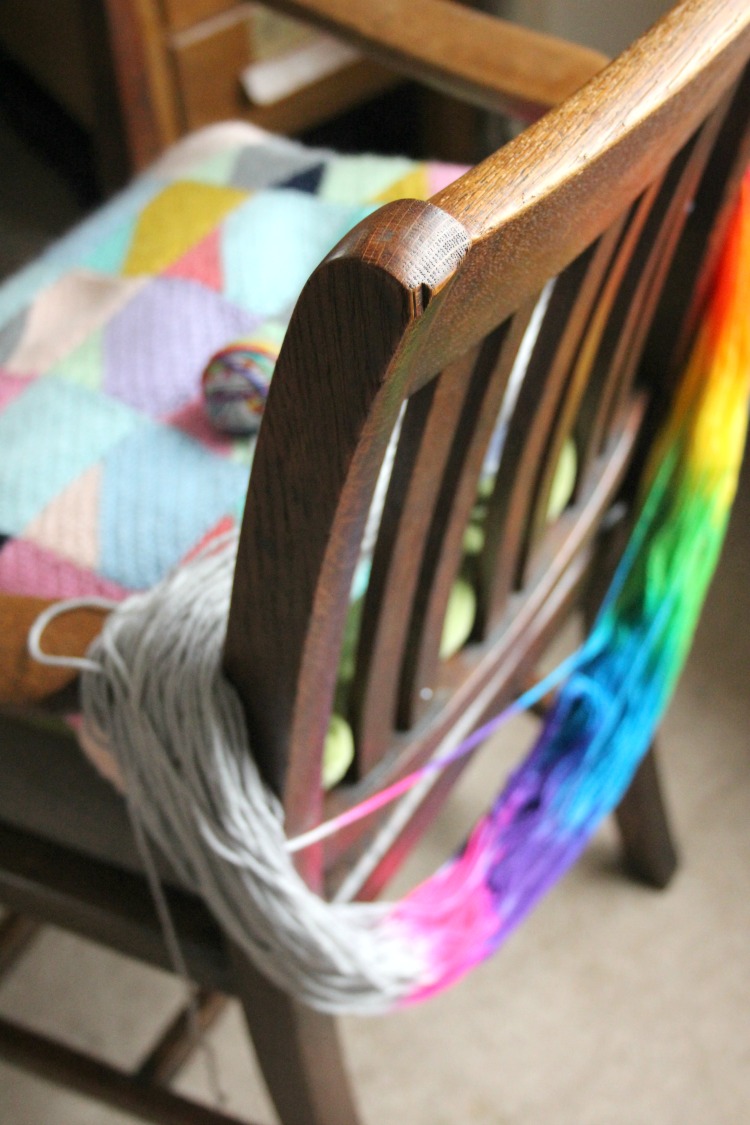
I was on the lookout for something that had both colourful brights and a plain base.  In my imagination, there was more grey and less colour. I didn’t really think about how the colours would be laid out on the skein, and I blame my lack of education regarding hand-dyed yarn rather than anything else. Still, I think the effect is pretty good. Just not what I was after in this case.

rainbow-yarn
rhapsodye-yarns
winding-yarn

I bought the rainbow dyed yarn from a UK dyer, Rhapsodye Yarns. It’s a superwash merino, and it’s just lovely!
See the running rainbow? I’d like only two, maybe three colours, each long enough to make a triangle, with grey in between each shade. Do you think I need to take up yarn dying as a hobby next?! I’m tempted to contact the dyer and make a special request instead. Seriously, I do not need any more hobbies right now.

For such a simple pattern, the crochet triangle design is so impactful. It is definitely worth trying this pattern if you haven’t already.

Save

Save

Save