The Dreckly Mittens – A Crochet Pattern

Behold! Feast your eyes upon my new favourite design!! How long will they be my favourite? who can say?! But for now I am ever so pleased with this new pattern for crochet mittens. Please say hello to the Dreckly mittens.

Read on for the story about how the mittens were born but fear not, I’m not going to make you scroll to access the pattern so I’ll do that bit now.

Please go to Ravelry HERE, Etsy HERE and Lovecrafts HERE.

Regulars will notice the small hike in price. All of my patterns are being reformatted and updated and then going up in price over the next few weeks so please do bear that in mind. Cheers.

Some back story then….

I wanted to come up with a pattern that was both classic and simple. It’s all too easy to get over excited and make things overly complicated. Basically, you want the yarn to do all the talking. And this yarn is lovely (even when you’ve frogged it three times because the pattern wasn’t quite how you wanted it to be!).

At the beginning of the year Sonja from John Arbon Textiles got in touch to offer yarn support. I was pretty much given free rein to have a play with their new range of yarn; Yarnadelic. It is a massive honour to be in a position where I get this kind of freedom. However, this is about trust too. A design should do the yarn justice, I can’t just chuck any stitches at it and expect it to look good. It doesn’t work like that. More than ever I want crochet to be the best it can be and that takes time. I’m also good at fannying about and not getting stuff done so yeah, this project has been a long time coming.

A design ought to have a fitting name. Seeing as I am in Devon and the yarn is produced by a Devon company I thought it would be good to pay tribute to that. These woolly warm mittens were supposed to have been released a long time ago. I was meant to have brought them to you directly. Or if you’re in the Southwest… Dreckly, an unspecified time, later. Dreckly is something that you will get around to at some point in the future, or possibly never. [This last line was taken off the internet but I can’t remember where- soz].

So much dithering took place that actually, these are not the first Dreckly digit coverings. A different pair of wrist warmers were given the title. (They may or may not see the light of day but for now, consider them shelved). Therefore, for a long time Dreckly were the Ansum mittens instead, as in “Alright, me ansum?!” which is another South West saying. (I’m avoiding causing trouble by saying South West rather than Devon because I have a feeling that Cornwall could claim these sayings as theirs also, I dunno…). Dreckly is better and it works with their story.

They can be wrist warmers too!

I’m working on another pair at the moment, they’re really addictive. I want to see them in lots of different colour combination and I’m finding it hard to stop. I think that’s a sign of a good design, yes?!

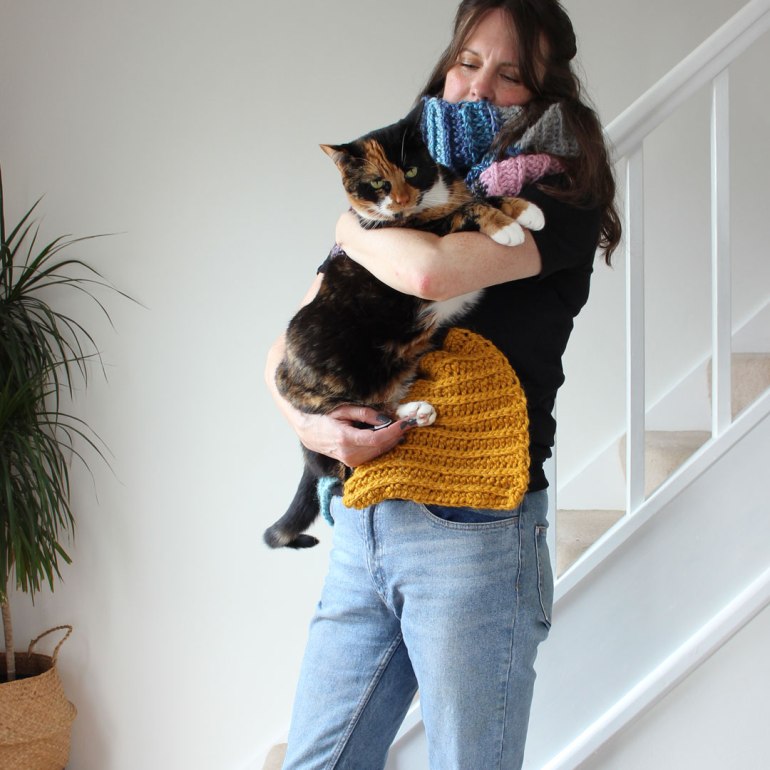
Do you know what was really good fun? Taking them on a photo shoot! So good, it happened twice!! This is due to there being only one rainbow striped mitten ready at the first shoot. I thought I’d be able to get away with it but it just looked stupid having only one begloved hand. Artfully place the other paw in a pocket? No, it’s just stupid (see below).

By the way. I’m wearing Revival, a granny jumper by HG Designs

Anyway, I want to stop writing now. It’s tea time and I want food over blogging. I’ll just whack up a huge amount of pictures for your perusal. Some arguably artful, some daft, all self indulgent. And it sort of became a crap story too…

Subscribe to Blog via Email

Enter your email address to subscribe to this blog and receive notifications of new posts by email.

This, as someone on Insta pointed out, is like a detective character from a BBC crime drama. I’ll have to continue with this premise at a later date because it’s awesome. Imagine a British Sarah Lund – making crochet mittens and jumpers famous…
I live over there!
Rolling up the sleeves to do some serious crime solving.
What’s this?! A clue?….
Where were you on the night of the 5th?!
Rule breaker, rebel, double crochet wearer.
She hasn’t slept for 30 hours. She won’t rest until the murderer is being dragged away in cuffs (the metal kind, not front post/back post).
She doesn’t care about you, she only cares about the law (and the kids…. and crochet…)
Dammit, I’ll solve this crime on Monday, I’m taking the kids to Legoland at the weekend.
I’m leaving this on a cliffhanger; I have no idea what I’m doing…

If you got this far, let me know by writing in the comments! Cheers. x

Z&R Crochet Podcast Episode 82.

It has been more than a month since the last crochet podcast! A Month! I’m still undecided about whether this is a good idea to go monthly because this episode is a whopper! What do you reckon? Less often but bigger episodes? Or shorter, more regular editions…? I’m open to experimentation if you’ll let me!

Right, anyway, please click on the image above to go directly to episode 82 of the Zeens and Roger Crochet vlogcast, or rummage through all of my YouTube content, HERE. Ta very much

Links:

If you would like to support me further, here is a lovely list pf the places you can do that. Whether it’s buying a pattern: RAVELRY, ETSY, LOVECRAFTS, or buying me a KO-FI or perhaps, getting more good stuff more on PATREON, you make my day on every single interaction. Thank you. xxxx

Yarns discussed: Yarnadelic (comes in 100g and 25g skeins), Beehive Yarns, Folkestone Harbour Yarns, Longdog Yarns.

My patterns:

The JW Anderson Cardigan

Go Your Own Way shawl

Brighter Future cowl

Easy Chunky Scarf

Havana Nights blanket

Crochet spider pattern and tutorial

Tassel Tutorial

Other Good Stuff:

The French Press Cardi by TL Yarn Crafts.

The Colour Pop Sweater by My Square Hat. I did talk about this in more detail (as well as a riveting chat about cats, rats and tortoises) but my camera ran out of juice and dumped the lot. Sad times.

Scroll down for looooads of photos, including a sneak peek at the Ansom mittens. Thanks!

Subscribe to Blog via Email

Enter your email address to subscribe to this blog and receive notifications of new posts by email.

My Crochet JW Anderson Cardigan

I can’t say why I decided to jump on the Harry Styles cardigan bandwagon, I feel way too old for this sort of game. Am I woollen spun mutton dressed as soft worsted lamb? I can’t help it, sometimes I am filled with creative urges and can’t rest until I have rummaged through the yarn stash to find what will satisfy them.

Let me first state a disclaimer: I have not intended to create a step-by-step pattern/tutorial. Think of it more as a chat with detail. If you have crochet experience and you want make yourself a chunky-ish crochet cardigan then there is enough information written here, and discussed in the YouTube video (click on the pic above to go to the episode), to ensure that you can make it happily. You’ll be tangled in yarn, but hopefully, you’ll also be happy. I assume you know crochet and are not brand new to my absolute favourite of crafts.

EDIT:: I made a second cardigan HERE, go check it out! Many changes have been made and you might be interested to see. Thanks

Right, I’m not going to fuss. Let’s just get straight on it. Please read on for all the good stuff.

The ultimate comfort combo of slippers n cardi.

You Will Need:

Loads of aran weight yarn in the colours of your choice. Whether working as individual squares or all in one piece, you’ll want 12 grams per square (I weighed a couple of swatch squares and they weighed 11 point something).

I used a 6mm hook. Normally I’d use a 5 or 5.5mm hook for aran weight as I have a loose tension but I wanted this cardi to have a drapier finish.

5 buttons. (Mine are 3cm diameter).

Needle for seaming together and weaving in a bajillion ends.

Fun Cardi Facts:

My finished cardigan measures: Length: 55cm / 21.5 inches. Width of body: 63cm / 25 inches. Sleeve length: 58cm / 23 inches. Sleeve circumference: 36cm / 14 inches. I am a UK size 10 and this would still have lots of positive ease if you’re a UK 14. After that I reckon the fit would change and you should consider adjusting your square sizes. Any smaller than a size 10 and you might find it’s too big so make each square smaller.

Each square is 18 stitches by 13 rows. To size up or down, it’s about 1 row and 2 stitches per cm (just under half an inch) so add or subtract that amount to change the sizes.

My squares are 5×5 inches. But, surprise surprise, I did not make individual squares!! I used intarsia colourwork to create the illusion of squares; working row by row and swapping yarns each time I wanted to change colour. Remember to watch the vid for more detail.

The stitches I used were mostly UK half trebles (US hdc). Where I write “HT” on the chart below, that stands for Hounds Tooth stitch (must make a tutorial for this myself but there are loads on YouTube already), “FLO” stands for front loop only. I am linking to a scarf tutorial of mine HERE. It uses the same technique.

For the animal print squares I went to Lottie & Albert for inspiration. Lindsay has a free chart that creates a much larger piece of crochet with tr stitches rather than htr. I made up my own chart for the cardi (below).

I began my pieces (the main body and two sleeves) with a foundation half treble (US hdc). This was a good base to then begin the colour work of the squares. Using the same colour as the ribbing helps to ensure it looks like a cohesive join too. Multiply the number of stitches per square by the amount of squares. Working on one giant piece like I did? Then it’s a foundation of 162. The sleeves were 54.

The ribbing is made in a similar way to the FLO stitch I use. Again, use the scarf tute HERE. I chained 13 for the waist band and 10 for the cuffs. Cuffs are 26 rows, no idea what the waist band is and there’s no way I’m counting them all (soz!) but it’s about 4 inches shorter than the main body piece. This brings it in to make it a better shape. It’s a technique I’ve robbed from my mate Heather of HG Designs Crochet.

The button band is a starter of 9ch and is worked onto the cardigan directly using an interesting technique that should be part of every crocheter’s repertoire. Rather than me type out an explanation, I suggest you watch the vid, it’s all there.

Step By Step Basics:

  1. Make pieces.
  2. Attach ribbing to main body.
  3. Seam sleeves & then add cuffs.
  4. Join at shoulders.
  5. Make button band/collar (see the vid, I show how).
  6. Attach sleeves. Use plenty of stitch markers to help with easing them in. Double check you’re not going to sew them on inside out like I did the first time!
  7. Sew on buttons.

Charts:

Neck Shaping:

You don’t have to shape at the neck like I did. But if you find it terribly flattering and can’t live without it, once you hit the last/top squares at the neck (the triangley ones indicated above), it’s a simple matter of one decrease per row. I say “simple”, I actually made it much harder for myself by having both squares be patterny. If you don’t fancy a decrease on the animal print colour work, or the hounds tooth square. Change them to a plain htr. It might save your last semblance of sanity.

Animal print rather than a houndstooth print.

Last Few Bits:

OK, I think that’s it. Please do let me know if you have any questions. I’ll try and help if I can but as I said before, this is aimed at those with at least the basics of crochet under their belt.

You wouldn’t believe the amount of work that goes into even doing this kind of casual outline of a pattern. Feel free to buy me Ko-fi !! Or, you might like to take a look at some of my other free patterns. Thank you!!

When you’ve made yourself an awesome cardi, please do let me know. The easiest thing to do is find me on Instagram as @zeendandroger

Right, I’m off to work on my next outstanding piece of crochet. See you soon. xxx

Subscribe to Blog via Email

Enter your email address to subscribe to this blog and receive notifications of new posts by email.

Did you really read it all?!
A second version, it’s linked at the very top. x

Easy Chunky Scarf: Free Crochet Pattern

Chunky Crochet Scarf

Do you like chunky knits? Then this is the craft project for you! My really simple, chunky crochet scarf is made using just one easy stitch and I’m going to show you how it’s done. With super chunky yarn it’s super quick to make, and colour blocking means it looks completely awesome!

Make this warm and woolly scarf using the written pattern below. And I have put together a video tutorial on how to crochet a chunky scarf too. Pop across to my YouTube channel HERE or click on the picture above to go straight to scarf tutorial.

Before I kick off with the written pattern, I will quickly mention that if you like this chunky scarf pattern and fancy buying me a coffee, I have a Ko-Fi account. It’ll more likely be tea actually as I don’t drink coffee but you know what I mean! You can also find more Free Crochet Patterns, HERE.

Spot the cat

Chunky Scaf Pattern

Notes to read first

  • The written pattern is in US terminology as it seems more people use that than UK. If you speak UK terms, substitute the main stitch for 1htr instead of the hdc, they’re exactly the same stitch.
  • For a neater look, work the first row into the back bumps of the chain.
  • I used a 9mm hook and super chunky yarn.
  • I decided on seven balls of yarn for this scarf.
  • If your tension is really loose try an 8 or 8.5mm hook instead. Tight crochet tension? Gup to a 10mm.

You’ll need four balls of King Cole Timeless (90% acrylic, 10% alpaca, 93yds/85m/100g): Turquoise, Grey, Rose Petal and Mustard and three balls of King Cole Explorer (80% acrylic, 20% wool, 87yds/80m/100g): Hawkins, Drake & Earhart. Both are available at LoveCrafts. By hitting this link it tells the company that I sent you and I get a few pennies from each sale. It’s an affiliate link.

Chain 29
Row 1: 1hdc in second ch from hook, hdc to end, turn. [28 sts]

Row 2: 1ch, hdc in front 3rd loop to end, turn.

Rep Row 2, changing colour every 20 rows. Alternate solid colours with variegated colours. Fasten off and sew in ends.

And that’s it!! I mean, quick fix crochet or what?!

I really enjoy working on this kind of mindful craftiness. Simple crochet, tactile yarn, relaxed brain. Love it!!

Gonna crochet a scarf? Share on Instagram by tagging me and using the #ZeensAndRoger hashtag.

Subscribe to Blog via Email

Enter your email address to subscribe to this blog and receive notifications of new posts by email.

Thanks! x

Z&R Crochet Podcast 81. Inspired for Autumn

Hello and welcome to Episode 81 of the Zeens and Roger Crochet Vlogcast! How are you? I hope you enjoy the episode… Not much to link today but I will share some pics so you can get a quick idea of what I talk about.

To watch this crochet extravaganza, please do click on the picture above. This will take you directly to the episode on YouTube. Oorrrr, the whole channel is HERE.

Thank you xxx

Links:

I am enjoying working with John Arbon Textiles Yarnadelic at the moment. I’ll share the project when I’m done!

I have extra good stuff on Patreon if you fancy giving a monthly subscription a try. So far Patrons have received at least one free pattern per month and usually there’s an extra, more focused video too. Not to mention opportunities to name designs and get involved in other ways….

Or, if that’s a bit much, you can buy me a coffee HERE (it’d be tea actually but you know, it’s Ko-fi not Ko-tea)

Subscribe to Blog via Email

Enter your email address to subscribe to this blog and receive notifications of new posts by email.

Ruffled Feathers appears in issue 128 of Inside Crochet magazine
My Ticking Mitts appear in issue 128 of Inside Crochet
Don’t ask, I just don’t know….

How to make Tassels

Making tassels is like stepping into a fairy ring. You can make hundreds and only mere minutes will have passed. It turns out that making a video tutorial for tassels is pretty much the same. It took no time at all to make! For the video tutorial, please click on the picture above, which will take you to where you want to go. Or Go HERE for all my YouTube videos.

Boldly and confidently, I shall also add links to my Patreon HERE, and KO-Fi HERE. Both help to support my crochet adventures and go towards improving the quality of the content I put out. Cheers! x

Are you a tassel fan? It’s a highly addictive yarn sport!

Subscribe to Blog via Email

Enter your email address to subscribe to this blog and receive notifications of new posts by email.

Easy to make Tassels

Z&RCrochet Podcast 80. Gathering Dust

Hi! Welcome to episode 80 of the Zeens and Roger Crochet Podcast! To watch the episode, click on the pic above or go HERE to my YouTube channel. Thanks

Oh, and don’t forget, there is a FLASH SALE over on Ravelry and Etsy until midnight on Sunday 6th September.

Links:

HG Designs on YouTube. I’m giving away one copy of Heather’s latest jumper design, Revival on the episode, watch to find out how to win!

Free Granny Square pattern

Free C2C Needle case pattern

Throwing Shapes is available on Ravelry and Etsy, (any moment now) Lovecrafts

If you’re on Instagram, follow me HERE. Then check out #YarnFriendsRock for daily prompts throughout this September challenge hosted by @Hookonepurlone et al

Do you want to support me in extra ways? Patreon is HERE, Buy me a ko-fi HERE and don’t forget to shout out about the free patterns you’ve made! Thank you so much xx

Subscribe to Blog via Email

Enter your email address to subscribe to this blog and receive notifications of new posts by email.

C2C Needlecase. Free Pattern
Giant Red
Throwing Shapes
Free Granny Square pattern

C2C Needle Case. Free Crochet Pattern

If you fancy a break from some of your bigger crochet WIPs, or you need to dip your toe back into crojo waters, then this little corner to corner needle case is the ideal quick crochet project. This easy c2c project has been sat in the archives for a couple of years. I designed it for a specific publication but it was never chosen (standard stuff in the design game!).

I won’t mess about I’m just going to pop the crochet pattern down below. If you make this speedy DIY corner to corner needlecase, please do let me know, I really love seeing projects made from the designs I share. Other crochet freebies are HERE or you can get some of my more in depth patterns on Ravelry & Etsy

If this is a crochet c2c pattern you’ve enjoyed, please do think about supporting me by gifting a few quid on Ko-fi

C2C Crochet Needlecase Pattern

Please note that this crochet pattern is written in UK terms (Essentially, where it says tr, that’s a US dc, a UK DC is a US sc).

Things you need to crochet your corner to corner case:
3 mm hook,
DK acrylic yarn, I used Stylecraft: 15g MC (Turquoise), 5g each CC 1 (Fuschia) & 2 (Lapis),
A button,
Felt: 11×16 cm approx, plus extra if making a pocket,
Needle for sewing button and felt.
Finished case measures approx: 7.5cm x 11cm

Row 1: With CC1 6ch, 1tr in 4th ch from hook, 1tr in next 2 sts, turn. [1 block]

Row 2: 6ch, 1tr in 4th ch from hook, 1tr in next 2 sts, sl st into the 3ch-sp of previous row, 3ch, 3tr into same 3ch-sp, turn. [2 blocks]

Row 3: 6ch, 1tr into 4th ch from hook, 1tr in next 2 sts, *sl st into next 3ch-sp of previous row, 3ch, 3tr in same 3ch-sp; rep from * to end, turn. [3 blocks etc]

Row 4 -8: Continue increasing as Row 3, change colour to MC at the end of row 4. 

Row 9: Repeat Row 3, ending with 1sl st  in the last 3ch-sp (ie. do not make the last block), turn. 

Row 10: Sl st along the next 3 sts and into the first 3ch-sp, [3ch, 3tr] in same ch-sp, continue making blocks in each 3ch-sp to the end, turn.

Row 11: Rep row 9  

Row 12: Rep row 10

Row 13 -19: Sl st along the next 3 sts and into the first 3ch-sp, [3ch, 3tr] in same ch-sp, continue making blocks, end with 1sl st into the last 3ch-sp, turn. Change to CC2 at the end of Row 15

To finish, sl st across the last 3 sts and into the corner, fasten off. 

With right side facing, go around the edge of the work with dcs: 2dc in horizontal st, 1dc in each vertical tr, 3dc in each corner.  At the centre of the right hand side, ch10 and join with a sl st and carry on with edging. Colour match as you go. Sew in ends. Sew on a button on the left hand side.

Hand stitch or glue felt to the inside. You could even add a little pocket!

Subscribe to Blog via Email

Enter your email address to subscribe to this blog and receive notifications of new posts by email.

crochet pattern for a c2c needle case

Viral. A Free Granny Square Pattern

A quick crochet granny square pattern for when you want to have some granny square fun! I love these crochet squares and I have had to stop myself from making more and more of them. They’re extremely addictive!

Pattern

Notes: 

  • When making tr in the rows/ch-sps below, don’t pull up the yarn too tight.
  • You need a 4mm (US G/6) hook and scrap dk acrylic or your own choice of yarn.
  • 3ch counts as 1tr stitch (US dc).
  • 2ch counts as 1htr stitch )US hdc).
  • Written in UK terms.
  • For rnd 3, when making the tr into rnd 1 , pull the loop up to the height of rnd 3. Complete as a normal tr.
  • Change colour on the last yrh of the htr join.

Special stitches: 
htr join: yrh (yarn round hook), insert hook in top of 3ch, yrh, pull through, yrh, pull through all 3 loops.

With YA chain 5 and join with a sl st.
Rnd 1: 3ch, 2tr, (2ch, 3tr) three times, htr join.

Rnd 2: 3ch, 2tr in ch-sp, *1ch, (3tr, 2ch, 3tr) in corner sp; rep from * twice, 3tr in ch-sp, 1htr join changing colour to YB on the last pull through (yrh). 

Rnd 3: 3ch, 1tr in 2ch-sp of rnd 1, 1tr, *1ch, (1tr in 1ch-sp, 1tr in middle tr of rnd 1, 1tr) in 1ch-sp, 1ch, (1tr, 1tr in ch-sp of rnd 1, 1tr, 2ch, 1tr, 1tr in ch-sp of rnd 1, 1tr, ) in corner ch-sp; rep from * twice, 1ch, (1tr in 1ch-sp, 1tr in middle tr of rnd 1, 1tr) in 1ch-sp, 1ch, 1tr, 1tr in ch-sp of rnd 1, 1tr, 1htr join.

Rnd 4: 3ch, 2tr in ch-sp, *1ch, [3tr in next 1ch-sp, 1ch] twice, **(3tr, 2ch, 3tr) in 2ch-sp; rep from *three times ending final rep at **, 3tr in corner ch-sp, 1htr join changing colour to YC on last pull through.

Rnd 5: 2ch, 1htr in corner ch-sp, htr to corner, *(2htr, 2ch, 2htr) in 2ch-sp, htr to corner; rep from twice, 2htr in corner ch-sp, 2ch and join with a sl st to top of 2ch.

Let me know if you make some, I’d love to see. Cheers! x

Subscribe to Blog via Email

Enter your email address to subscribe to this blog and receive notifications of new posts by email.

Z&R Crochet Podcast 79. Place Your Bets

Halllooooo! Episode 79 of my crochet podcast is here at last! I’m sure you were desperately waiting! Please see below for pics and links to projects discussed and other related things. To go directly to the episode, please hit the pic above to take you to the episode or go HERE to my YouTube channel. Ta very much. x

Links:

The recent granny market bag blog post is HERE. I talk about the alterations I made to the original pattern, which is linked in the post or you can find it in the Free Patterns page.

Days of Summer is out NOW and there is 20% off until the 31st of August on Ravelry and Etsy. It is also available from LoveCrafts. Read the story about it and its team mates HERE.

Join the Patreon gang! Please pop over and have a look HERE.

Failing that, feel free to buy me a coffee on KO-Fi (although it actually won’t be a coffee cos I don’t like it! – I’m saving up for a new camera so I can record a better quality podcast).

Subscribe to Blog via Email

Enter your email address to subscribe to this blog and receive notifications of new posts by email.

Thank you xxx

Pattern coming soon. x

xxx